No-Bake Marshmallow Dream Slice
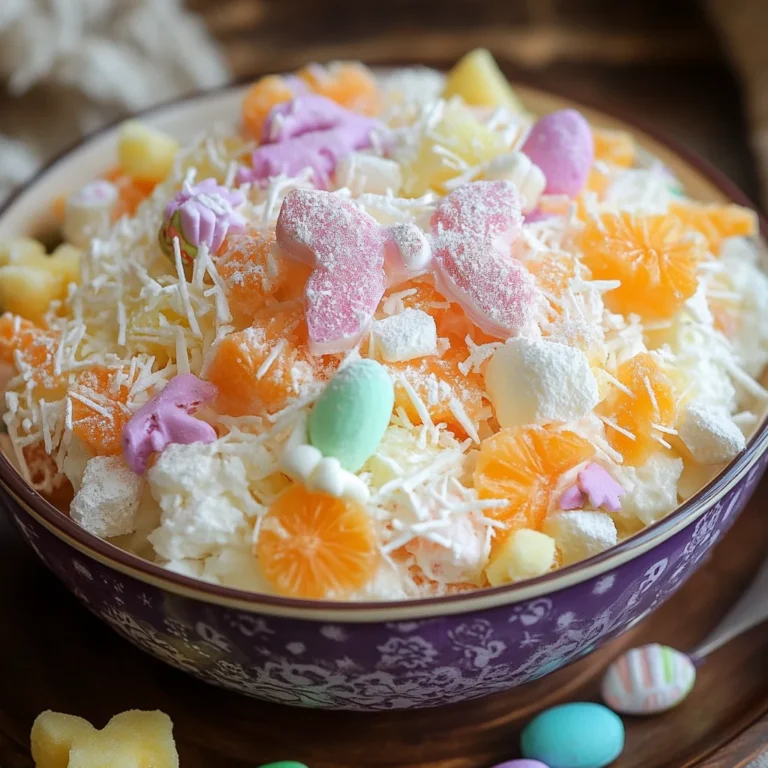
Description: This No-Bake Marshmallow Dream Slice is a delightful and easy-to-make dessert that requires no oven! It features a buttery graham cracker crust topped with a creamy, dreamy marshmallow filling studded with colorful mini marshmallows and optional white chocolate chips. It’s a perfect treat for any occasion, from casual gatherings to festive celebrations.
Why You’ll Love This Recipe:
- Effortless & No-Bake: This recipe is incredibly simple and requires no baking! Perfect for hot summer days or when you just don’t feel like turning on the oven.
- Deliciously Creamy: The combination of softened cream cheese, powdered sugar, and whipped cream creates a smooth and luscious filling that melts in your mouth.
- Marshmallow Magic: The abundance of mini marshmallows throughout the slice provides a fun, chewy texture and a burst of sweetness in every bite.
- Customizable: Easily adaptable to your personal preferences. Swap out the graham crackers for your favorite cookies, add different types of chocolate chips, or experiment with various flavor extracts.
- Perfect for All Ages: Both kids and adults will adore this sweet and whimsical treat.
Introduction
The No-Bake Marshmallow Dream Slice is a nostalgic treat that evokes memories of childhood sweets and simple pleasures. This recipe takes that classic marshmallow goodness and elevates it into an elegant, yet effortless, dessert. The contrasting textures of the crunchy graham cracker crust and the soft, pillowy marshmallow filling create a delightful sensory experience. This is the perfect dessert to whip up when you’re short on time but still want to impress. It’s also a great way to get the kids involved in the kitchen, as it’s a fun and forgiving recipe. The beauty of this recipe lies in its versatility. Feel free to experiment with different flavors and toppings to create your own unique version. From adding a hint of citrus zest to incorporating chopped nuts, the possibilities are endless. This is more than just a dessert; it’s a blank canvas for your culinary creativity. So, gather your ingredients, put on some music, and get ready to create a Marshmallow Dream Slice that will have everyone begging for more.
Ingredients:
For the Crust:
- 1 ½ cups crushed graham crackers or digestive biscuits, vanilla wafers, or shortbread cookies
- ½ cup (1 stick) unsalted butter, melted
For the Marshmallow Filling:
- 8 oz cream cheese, softened
- ½ cup powdered sugar
- 1 teaspoon vanilla extract
- 1 ½ cups heavy whipping cream
- 2 cups mini rainbow marshmallows
- ½ cup white chocolate chips (optional, but adds extra sweetness!)

Preparation:
Step 1: Prepare the Crust
In a medium bowl, combine the crushed graham crackers and melted butter. Mix well until the mixture is evenly moistened and resembles wet sand. The key here is to ensure that all the crumbs are coated with butter, as this will help them bind together and form a sturdy crust.
Press the graham cracker mixture firmly into the bottom of an 8×8-inch baking dish. It’s important to use a baking dish of this size to ensure the correct thickness of both the crust and the filling. Line the baking dish with parchment paper or foil, leaving an overhang on the sides. This will make it much easier to lift the slice out of the dish later.
Use the bottom of a measuring cup or a flat-bottomed glass to evenly press the mixture into the dish, creating a compact and uniform crust. The firmer the crust, the better it will hold the filling. Place the baking dish in the refrigerator to chill for at least 10 minutes while you prepare the filling. This will allow the crust to set and prevent it from crumbling when the filling is added.
Step 2: Make the Filling
In a large mixing bowl, beat the softened cream cheese, powdered sugar, and vanilla extract together until smooth and creamy. It’s essential to use softened cream cheese, as it will incorporate more easily and prevent lumps in the filling. Use an electric mixer (either a stand mixer or a hand mixer) for best results.
Scrape down the sides of the bowl as needed to ensure that all the ingredients are fully combined. Continue beating until the mixture is light and fluffy. In a separate bowl, whip the heavy cream until stiff peaks form. This is a crucial step, as the whipped cream provides the filling with its light and airy texture.
Make sure the heavy cream is cold before whipping, as this will help it whip up faster and create a more stable foam. Use an electric mixer and beat the cream on medium-high speed until it forms stiff peaks. Be careful not to overwhip the cream, as it can turn into butter. Gently fold the whipped cream into the cream cheese mixture until fully incorporated. This is a delicate process, so be sure to use a gentle hand to avoid deflating the whipped cream. Fold until just combined, leaving a few streaks of whipped cream visible.
Step 3: Assemble the Slice
Gently fold in the mini marshmallows and white chocolate chips (if using). Be careful not to overmix, as this can cause the marshmallows to break down and the white chocolate chips to melt. The marshmallows should be evenly distributed throughout the filling, providing a burst of sweetness and chewiness in every bite.
Spread the marshmallow mixture evenly over the chilled crust, smoothing out the top with a spatula. Use a spatula or an offset spatula to create a smooth and even surface. This will make the slice look more professional and ensure that each square is uniform. Sprinkle extra mini marshmallows on top for decoration. This is an optional step, but it adds a festive touch to the slice and makes it even more appealing.
Step 4: Chill & Serve
Cover the baking dish with plastic wrap or a lid and refrigerate for at least 4 hours (or overnight) until firm. This is a crucial step, as it allows the filling to set completely and makes it easier to slice. The longer the slice chills, the firmer it will become.
Once the slice is firm, lift it out of the baking dish using the parchment paper or foil overhang. Place the slice on a cutting board and use a sharp knife to slice it into 12 even squares. Serve chilled and enjoy!
COOKING Rating:
Easy
Serving Suggestions:
- Serve as a standalone dessert with a cup of coffee or tea.
- Pair it with a scoop of vanilla ice cream or a dollop of whipped cream.
- Add a drizzle of chocolate sauce or caramel sauce for extra indulgence.
- Serve it at parties, potlucks, or picnics.
- Package it up as a homemade gift for friends and family.
Tips:
- For a richer flavor, use brown butter in the crust.
- Add a pinch of salt to the crust to balance the sweetness.
- Use high-quality vanilla extract for the best flavor.
- If you don’t have heavy whipping cream, you can use Cool Whip instead.
- Store the leftover slice in an airtight container in the refrigerator for up to 3 days.
Prep Time:
15 minutes
Cook Time:
0 minutes
Chill Time:
4 hours
Total Time:
4 hours 15 minutes
Nutritional Information:
(Approximate values, may vary based on specific ingredients)
Calories: 250 kcal
Protein: 2g
Sodium: 100mg
Conclusion
This No-Bake Marshmallow Dream Slice is a guaranteed crowd-pleaser that’s both easy to make and utterly delicious. Its creamy, marshmallow-filled goodness nestled upon a buttery graham cracker crust offers a perfect balance of textures and flavors. Whether you’re looking for a simple dessert for a weeknight treat or a show-stopping centerpiece for a special occasion, this recipe delivers every time. So, gather your ingredients, get creative with your toppings, and prepare to indulge in a slice of pure marshmallow heaven!
Questions and Answers:
Q1: Can I use a different type of cookie for the crust?
A: Absolutely! While graham crackers are the classic choice, you can easily substitute other cookies like digestive biscuits, vanilla wafers, or shortbread cookies. Just make sure to adjust the amount of melted butter accordingly to achieve the right consistency.
Q2: Can I make this recipe ahead of time?
A: Yes, this is the perfect make-ahead dessert! In fact, it’s best to make it at least 4 hours in advance to allow the filling to set properly. You can even make it the day before and store it in the refrigerator until you’re ready to serve it.
Q3: What if I don’t have an 8×8-inch baking dish?
A: While an 8×8-inch baking dish is ideal, you can use a slightly larger or smaller dish. Just be aware that this will affect the thickness of the crust and filling. If you use a larger dish, the slice will be thinner, and if you use a smaller dish, it will be thicker. You may also need to adjust the chilling time accordingly.
Q4: Can I add other toppings to the slice?
A: Of course! Feel free to get creative with your toppings. Some popular options include chopped nuts, shredded coconut, sprinkles, chocolate shavings, or a drizzle of caramel or chocolate sauce.
Q5: Can I freeze this marshmallow slice?
A: While freezing is possible, the texture of the marshmallows might change slightly after thawing. It’s best to consume it fresh for optimal taste and texture. If you do freeze it, wrap it tightly in plastic wrap and then in foil to prevent freezer burn. Thaw it in the refrigerator overnight before serving.