Easter Bread Recipe

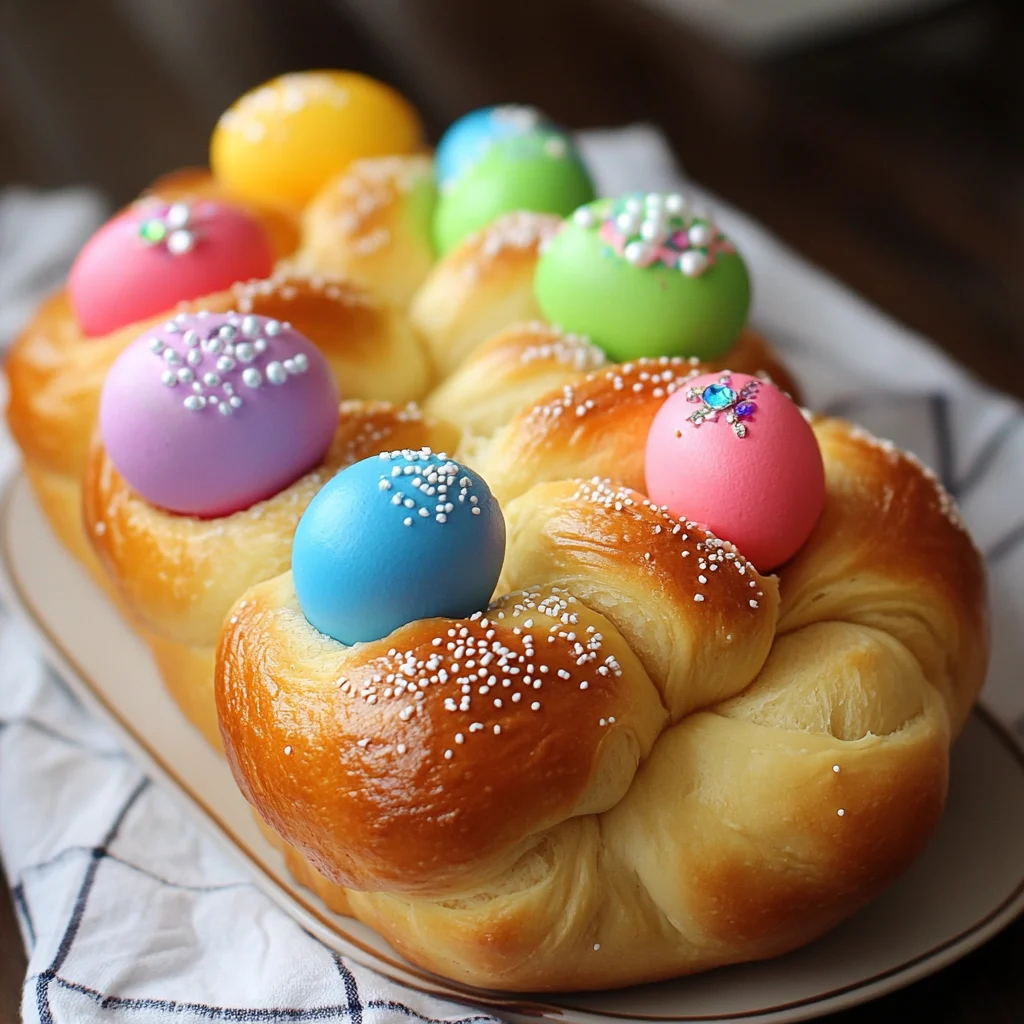
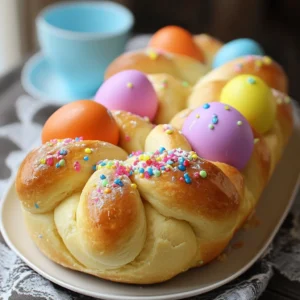
Description: This delightful Easter Bread is a simple yet stunning centerpiece for your Easter brunch. A slightly sweet, citrus-infused dough is braided into a ring and baked with a brightly colored, uncooked egg nestled in the center. The result is a visually appealing and delicious bread that embodies the spirit of Easter.
Why You’ll Love This Recipe:
- It’s Easy to Make: Don’t be intimidated by the braid! This recipe is straightforward and doesn’t require any advanced baking skills. The stand mixer does most of the work!
- Visually Stunning: The colorful egg nestled in the golden-brown bread makes a beautiful presentation that will impress your guests.
- Delicious Flavor: The combination of citrus zest, vanilla, and a hint of sweetness creates a delightful flavor that pairs perfectly with the savory egg.
- Fun for the Whole Family: Get the kids involved in dyeing the eggs and decorating the bread with sprinkles. It’s a great way to create lasting Easter memories.
- Perfect for Sharing: This recipe makes four individual breads, making it ideal for sharing with family and friends.
Introduction
Easter bread, in its many forms, holds a special place in culinary traditions across the globe. From the Italian Colomba Pasquale (Easter Dove) to the Greek Tsoureki, these breads are often symbolic, representing rebirth, renewal, and the joyous spirit of the holiday. This recipe offers a simplified, accessible take on the classic Easter bread, focusing on ease of preparation and visual appeal. The braided ring represents unity and eternity, while the egg symbolizes new life and the resurrection of Christ.
This version uses rapid-rise yeast to minimize rising time, making it perfect for busy bakers. The citrus zests add a bright, spring-like flavor that complements the sweetness of the dough. And the best part? The uncooked egg bakes right along with the bread, resulting in a perfectly soft-boiled egg that adds a unique element to each serving. Get ready to create a stunning and delicious Easter treat that will be the highlight of your celebration!
Ingredients:
For the Dough:
- 1 cup whole milk
- 1/4 cup (2 ounces/56 grams) unsalted butter
- 4 cups (500 grams) all-purpose flour, divided (2 cups for initial mixing, 2 cups for kneading)
- 1/3 cup (67 grams) granulated sugar
- 2 1/4 teaspoons rapid rise instant yeast (1 package)
- Zest of 1 lemon
- Zest of 1 orange
- 2 large eggs
- 1 teaspoon vanilla extract
For the Egg Wash:
- 1 large egg
- 1 teaspoon milk
Decorations:
- 4 dyed Easter eggs (uncooked – NOT hardboiled), natural dyes are great, like beets, and blueberries to not permeate the egg.
- Colorful sprinkles
Preparation:
Step 1: Prepare the Dry Ingredients. In a large mixing bowl, combine 2 cups of the all-purpose flour, granulated sugar, rapid rise instant yeast, lemon zest, and orange zest. Mix well with a spoon or whisk to ensure the yeast is evenly distributed. This step is crucial for activating the yeast and incorporating the flavors. Set aside.
Step 2: Warm the Milk and Butter. In a microwave-safe bowl or measuring cup, combine the whole milk and unsalted butter. Heat the mixture in the microwave in short intervals (about 30 seconds at a time), stirring in between each interval. The goal is to warm the mixture until the butter is melted and the milk is warm to the touch (around 110°F/43°C), but not scalding. Overheating the milk can kill the yeast, so be careful! Alternatively, you can melt the butter and warm the milk in a saucepan over low heat.
Step 3: Combine Wet and Dry Ingredients. Add the eggs and vanilla extract to the bowl of dry ingredients. Pour in the warmed milk and butter mixture. Using the dough hook attachment of a stand mixer, mix the ingredients on low speed for about 1 minute, or until a shaggy dough forms. The mixture will be quite wet and resemble a thick cake batter at this stage. Don’t worry, it will come together as you add more flour.
Step 4: Knead the Dough. Gradually add the remaining 2 cups of flour to the mixer, about 1/2 cup at a time, while continuing to mix on low speed with the dough hook. Once all the flour is incorporated, increase the speed to medium-low and knead the dough for about 8 minutes. The dough should become smooth, elastic, and slightly tacky, but it should not stick to the bottom of the bowl. If the dough is still too sticky, add flour, one tablespoon at a time, until it reaches the desired consistency.
Step 5: First Rest. Place the dough on a lightly floured surface or a silpat mat and knead by hand a few times to bring it together into a smooth ball. This helps to develop the gluten and create a more even texture. Try to use as little flour as possible to prevent the dough from becoming dry. Place the dough into a clean bowl, lightly greased with oil or butter, and cover with plastic wrap. Let it rest for 15 minutes.
Step 6: Shape the Bread. Remove the dough from the bowl and gently punch it down to release any trapped air. Divide the dough into 8 equal pieces. Roll each piece into a rope approximately 11 inches long. Pinch two ropes together at one end and braid the two pieces together. Form the braid into a ring and pinch the ends together securely to create a sealed circle.
Step 7: Second Rise. Place the braided rings on a baking sheet lined with parchment paper. This prevents the bread from sticking and makes for easy cleanup. Cover the rings loosely with plastic wrap and let them rise in a warm place for about 30 minutes to 1 hour, or until they have doubled in size. The rising time will depend on the temperature of your kitchen. A warm environment will speed up the process.
Step 8: Preheat Oven and Prepare Egg Wash. While the dough is rising, preheat your oven to 375°F (190°C). Prepare the egg wash by whisking together the egg and milk in a small bowl until well combined. This egg wash will give the bread a beautiful golden-brown color and a slightly shiny finish.
Step 9: Egg Wash, Decoration, and Baking. Once the dough has finished rising, gently brush the surface of each ring with the egg wash using a pastry brush. Be careful not to deflate the dough. Nestle an uncooked, dyed Easter egg into the center of each ring. Sprinkle the rings with colorful sprinkles for a festive touch. Bake for 20 minutes, rotating the baking sheet halfway through to ensure even baking.
Step 10: Cool and Serve. Let the bread cool on a cooling rack before serving. Easter Bread is best served warm.
COOKING Rating:
Easy to Medium
Serving Suggestions:
- Serve warm as part of your Easter brunch.
- Enjoy with a cup of coffee or tea.
- Slice and spread with butter, jam, or cream cheese.
- Make a delicious sandwich with leftover Easter ham.
- Enjoy as a light dessert.
Tips:
- Use Fresh Yeast: Ensure your yeast is fresh for optimal rising.
- Don’t Overheat the Milk: Overheating the milk can kill the yeast.
- Knead the Dough Well: Kneading the dough properly is essential for developing the gluten and creating a good texture.
- Don’t Overbake: Overbaking can result in dry bread.
- Get Creative with Decorations: Feel free to use different colored sprinkles or other decorations to personalize your Easter Bread.
Prep Time:
1 hour
Cook Time:
45 minutes
Rise Time:
30-60 minutes
Total Time:
2 hours 15 minutes – 2 hours 45 minutes
Nutritional Information:
(Note: Nutritional information is approximate and may vary based on specific ingredients used.)
- Calories: 450-550 per serving (depending on size)
- Protein: 12-15 grams
- Sodium: 150-250mg
Conclusion
This Easter Bread recipe is a delightful way to celebrate the holiday. It’s easy to make, visually stunning, and incredibly delicious. The combination of the slightly sweet, citrus-infused bread and the soft-boiled egg in the center creates a unique and satisfying treat. Get the whole family involved in the preparation and create lasting Easter memories. Happy baking!
Questions and Answers:
Q1: Can I use a different type of flour?
A: While all-purpose flour is recommended for this recipe, you can experiment with using bread flour for a slightly chewier texture. However, bread flour absorbs more liquid, so you may need to add a tablespoon or two of extra milk to the dough. Avoid using cake flour, as it doesn’t have enough gluten to provide the necessary structure for the bread.
Q2: What if I don’t have a stand mixer?
A: If you don’t have a stand mixer, you can knead the dough by hand. Follow the same steps for combining the ingredients, but instead of using the dough hook, turn the dough out onto a lightly floured surface and knead it for 10-12 minutes, or until it is smooth and elastic. The process will take a bit longer, but the results will be just as delicious.
Q3: Can I make the dough ahead of time?
A: Yes, you can make the dough ahead of time and store it in the refrigerator. After kneading, place the dough in a lightly greased bowl, cover it tightly with plastic wrap, and refrigerate for up to 24 hours. When you’re ready to bake, remove the dough from the refrigerator and let it come to room temperature for about 30 minutes before shaping and baking.
Q4: Can I use hard-boiled eggs instead of uncooked eggs?
A: While you can use hard-boiled eggs for decoration after baking, the recipe specifically calls for uncooked eggs. Baking the uncooked egg inside the bread results in a perfectly soft-boiled egg that complements the flavor and texture of the bread. Using hard-boiled eggs during baking would result in a dry and rubbery egg.
Q5: What if my bread browns too quickly in the oven?
A: If you notice that your bread is browning too quickly, you can tent it with aluminum foil. Simply loosely cover the bread with a sheet of foil during the last 5-10 minutes of baking to prevent it from burning.
Easter Bread Recipe
Ingredients
- For the Dough:
- 1 cup whole milk
- 1/4 cup 2 ounces/56 grams unsalted butter
- 4 cups 500 grams all-purpose flour, divided (2 cups for initial mixing, 2 cups for kneading)
- 1/3 cup 67 grams granulated sugar
- 2 1/4 teaspoons rapid rise instant yeast 1 package
- Zest of 1 lemon
- Zest of 1 orange
- 2 large eggs
- 1 teaspoon vanilla extract
- For the Egg Wash:
- 1 large egg
- 1 teaspoon milk
- Decorations:
- 4 dyed Easter eggs uncooked – NOT hardboiled, natural dyes are great, like beets, and blueberries to not permeate the egg.
- Colorful sprinkles
Instructions
- Step 1: Prepare the Dry Ingredients.
- In a large mixing bowl, combine 2 cups of the all-purpose flour, granulated sugar, rapid rise instant yeast, lemon zest, and orange zest. Mix well with a spoon or whisk to ensure the yeast is evenly distributed. This step is crucial for activating the yeast and incorporating the flavors. Set aside.
- Step 2: Warm the Milk and Butter.
- In a microwave-safe bowl or measuring cup, combine the whole milk and unsalted butter. Heat the mixture in the microwave in short intervals (about 30 seconds at a time), stirring in between each interval. The goal is to warm the mixture until the butter is melted and the milk is warm to the touch (around 110°F/43°C), but not scalding. Overheating the milk can kill the yeast, so be careful! Alternatively, you can melt the butter and warm the milk in a saucepan over low heat.
- Step 3: Combine Wet and Dry Ingredients.
- Add the eggs and vanilla extract to the bowl of dry ingredients. Pour in the warmed milk and butter mixture. Using the dough hook attachment of a stand mixer, mix the ingredients on low speed for about 1 minute, or until a shaggy dough forms. The mixture will be quite wet and resemble a thick cake batter at this stage. Don’t worry, it will come together as you add more flour.
- Step 4: Knead the Dough.
- Gradually add the remaining 2 cups of flour to the mixer, about 1/2 cup at a time, while continuing to mix on low speed with the dough hook. Once all the flour is incorporated, increase the speed to medium-low and knead the dough for about 8 minutes. The dough should become smooth, elastic, and slightly tacky, but it should not stick to the bottom of the bowl. If the dough is still too sticky, add flour, one tablespoon at a time, until it reaches the desired consistency.
- Step 5: First Rest.
- Place the dough on a lightly floured surface or a silpat mat and knead by hand a few times to bring it together into a smooth ball. This helps to develop the gluten and create a more even texture. Try to use as little flour as possible to prevent the dough from becoming dry. Place the dough into a clean bowl, lightly greased with oil or butter, and cover with plastic wrap. Let it rest for 15 minutes.
- Step 6: Shape the Bread.
- Remove the dough from the bowl and gently punch it down to release any trapped air. Divide the dough into 8 equal pieces. Roll each piece into a rope approximately 11 inches long. Pinch two ropes together at one end and braid the two pieces together. Form the braid into a ring and pinch the ends together securely to create a sealed circle.
- Step 7: Second Rise.
- Place the braided rings on a baking sheet lined with parchment paper. This prevents the bread from sticking and makes for easy cleanup. Cover the rings loosely with plastic wrap and let them rise in a warm place for about 30 minutes to 1 hour, or until they have doubled in size. The rising time will depend on the temperature of your kitchen. A warm environment will speed up the process.
- Step 8: Preheat Oven and Prepare Egg Wash.
- While the dough is rising, preheat your oven to 375°F (190°C). Prepare the egg wash by whisking together the egg and milk in a small bowl until well combined. This egg wash will give the bread a beautiful golden-brown color and a slightly shiny finish.
- Step 9: Egg Wash, Decoration, and Baking.
- Once the dough has finished rising, gently brush the surface of each ring with the egg wash using a pastry brush. Be careful not to deflate the dough. Nestle an uncooked, dyed Easter egg into the center of each ring. Sprinkle the rings with colorful sprinkles for a festive touch. Bake for 20 minutes, rotating the baking sheet halfway through to ensure even baking.
- Step 10: Cool and Serve.
- Let the bread cool on a cooling rack before serving. Easter Bread is best served warm.