Decadent Chocolate Dream
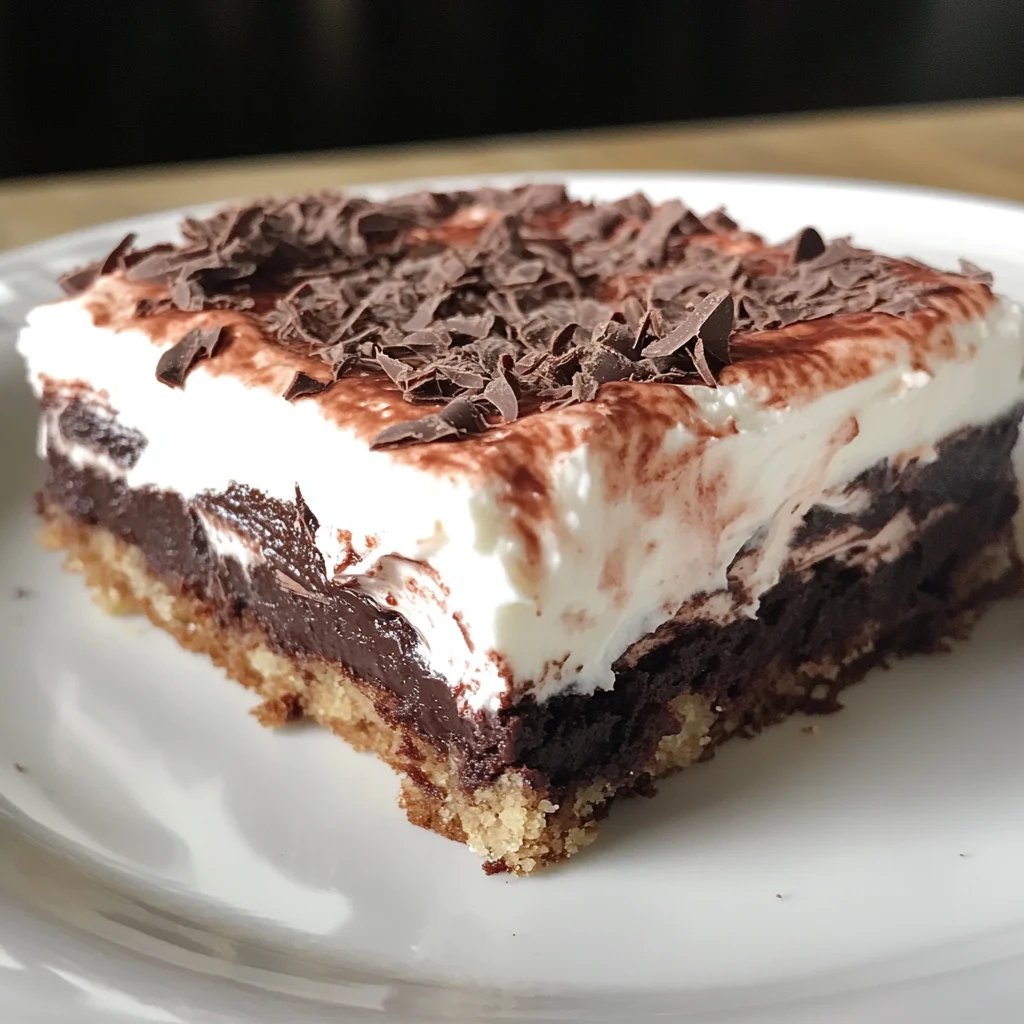
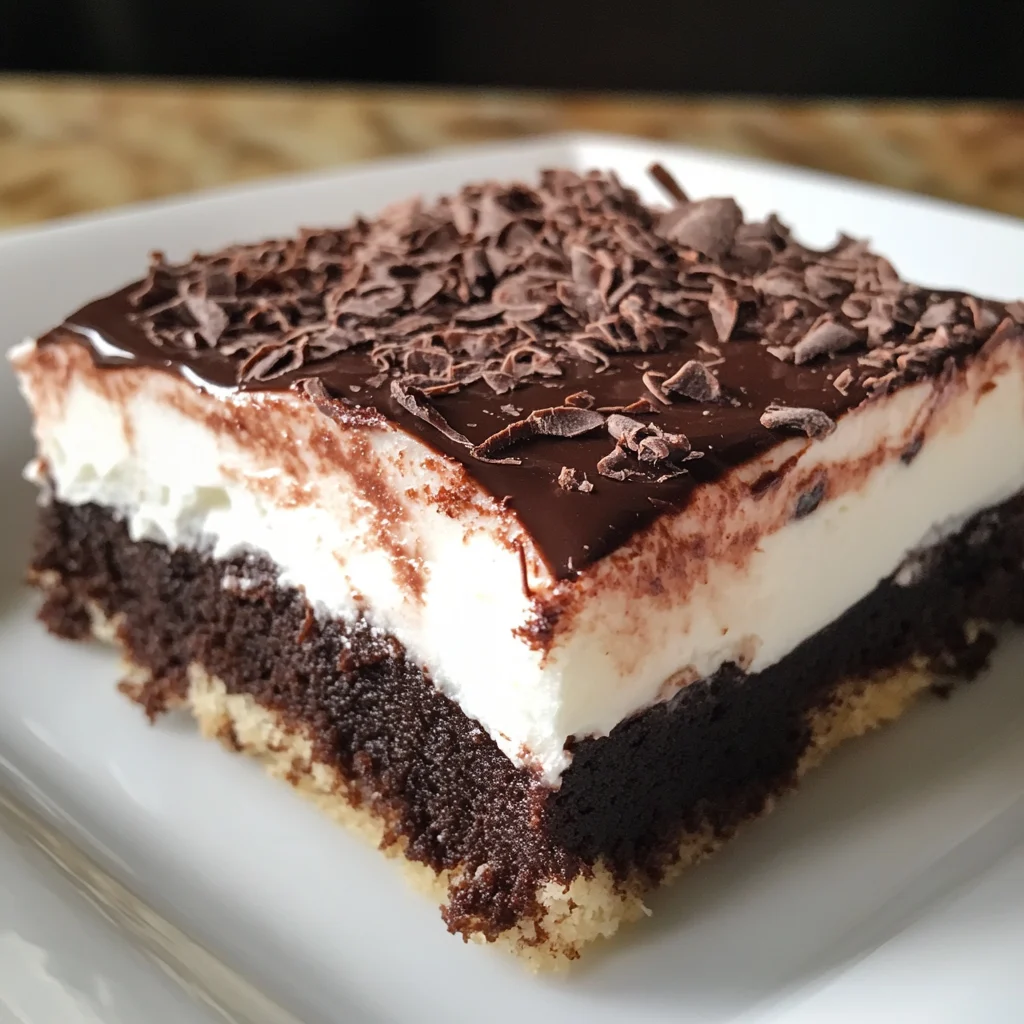
Description: This Chocolate Dream is a layered dessert masterpiece, perfect for satisfying even the most intense chocolate cravings. It features a buttery pecan crust, a creamy whipped cream cheese layer, a luscious chocolate pudding center, and a cloud of whipped topping. Each layer harmonizes beautifully to create a symphony of textures and flavors that will leave you wanting more.
Why You’ll Love This Recipe: This recipe is more than just a dessert; it’s an experience. The combination of the crunchy crust, the tangy cream cheese, the rich chocolate pudding, and the light whipped topping is simply irresistible. It’s also incredibly easy to make, requiring minimal baking skills and readily available ingredients. The layered presentation makes it a showstopper, perfect for potlucks, parties, or simply a special treat for yourself and your loved ones. Plus, you can customize the toppings to your liking, adding a personal touch to this already fantastic dessert.
Introduction
The Chocolate Dream dessert has been a crowd-pleaser for generations. Its origins can be traced back to classic Southern recipes, where layered desserts are a staple at gatherings and celebrations. This version combines the best elements of these traditional recipes, resulting in a dessert that is both comforting and indulgent. The secret lies in the balance of flavors and textures. The buttery, nutty crust provides a solid foundation for the creamy and rich layers that follow. The cream cheese layer adds a subtle tanginess that cuts through the sweetness of the chocolate pudding. And the whipped topping provides a light and airy finish that ties everything together. Whether you’re a seasoned baker or a novice in the kitchen, this recipe is sure to impress. So, gather your ingredients, put on your apron, and get ready to create a Chocolate Dream that will delight your taste buds and earn you rave reviews.
Ingredients:
- For the Nut Crust:
- 1 cup all-purpose flour
- 1/2 cup (1 stick) unsalted butter, melted
- 1/2 cup pecans, finely chopped
- For the Whipped Cream Cheese Layer:
- 8 ounces cream cheese, softened to room temperature
- 1 cup powdered sugar
- 8 ounces Cool Whip, thawed (half of a 16oz tub)
- For the Chocolate Pudding Layer:
- 2 boxes (3.9 ounces each) instant chocolate pudding mix
- 3 cups milk
- For the Whipped Topping:
- 8 ounces Cool Whip, thawed (remaining half of the 16oz tub)
- Optional Toppings:
- Chocolate shavings
- Chopped pecans
- Fresh berries (strawberries, raspberries, or blueberries)
- Chocolate syrup
- Mini chocolate chips
Preparation:
Step 1: Preparing the Nut Crust
Preheat your oven to 350°F (175°C). In a medium-sized mixing bowl, combine the all-purpose flour, melted butter, and chopped pecans. Mix thoroughly until the ingredients are evenly distributed and the mixture resembles coarse crumbs. This is the foundation of your Chocolate Dream, so ensure that all ingredients are well incorporated. The melted butter should bind the flour and pecans together, creating a slightly moist mixture.
Step 2: Baking the Crust
Press the nut mixture evenly into the bottom of a 9×13 inch baking dish. Use the back of a spoon or your fingers to create a uniform layer, ensuring that the crust is compact and even. A well-pressed crust will prevent it from crumbling when you slice and serve the dessert. Bake in the preheated oven for 15 minutes, or until the crust is lightly golden brown and fragrant. Keep a close eye on it to prevent burning. The nutty aroma will fill your kitchen, signaling that the crust is ready.
Step 3: Cooling the Crust
Remove the baking dish from the oven and allow the crust to cool completely to room temperature. This step is crucial because adding warm layers on top of a hot crust can cause the dessert to become soggy. Cooling the crust allows it to firm up, creating a stable base for the subsequent layers. Place the baking dish on a wire rack to facilitate even cooling. You can speed up the process by placing it in the refrigerator for a short period.
Step 4: Preparing the Whipped Cream Cheese Layer
In a large mixing bowl, using an electric mixer, cream together the softened cream cheese and powdered sugar until the mixture is smooth and fluffy. Ensure that the cream cheese is at room temperature to avoid lumps and to achieve a creamy consistency. Beat the mixture on medium speed for about 2-3 minutes until it is light and airy. Then, gently fold in half of the thawed Cool Whip until it is fully incorporated. Be careful not to overmix, as this can cause the Cool Whip to deflate.
Step 5: Layering the Cream Cheese Mixture
Scoop the cream cheese mixture on top of the cooled nut crust and spread it evenly. Use a spatula or the back of a spoon to create a smooth, uniform layer. This layer should completely cover the crust, providing a creamy and tangy counterpoint to the other layers. Allow this layer to set in the refrigerator for about 15-20 minutes before adding the chocolate pudding layer. This will help prevent the pudding from seeping into the crust.
Step 6: Preparing the Chocolate Pudding Layer
In a separate mixing bowl, whisk together the instant chocolate pudding mixes and milk until well combined and smooth. Follow the instructions on the pudding mix box for the best results. Continue whisking for about 2 minutes until the pudding starts to thicken. The mixture should be free of lumps and have a smooth, velvety texture.
Step 7: Layering the Chocolate Pudding
Gently pour the chocolate pudding mixture over the cream cheese layer. Spread it evenly using a spatula or the back of a spoon, ensuring that all of the cream cheese is covered. This will create a rich and decadent chocolate layer that complements the creamy and nutty flavors of the other layers. Be gentle when spreading the pudding to avoid disturbing the cream cheese layer.
Step 8: Adding the Whipped Topping
Carefully spread the remaining Cool Whip (the other half of the tub) on top of the chocolate pudding layer. Create a smooth and even layer that covers the entire surface of the dessert. You can use a spatula or a piping bag to achieve a decorative finish.
Step 9: Chilling and Setting
Cover the baking dish with plastic wrap and chill the completed Chocolate Dream in the refrigerator for at least 1 hour, or preferably longer, to allow all the layers to set completely. The longer it chills, the better the flavors will meld together and the easier it will be to slice and serve.
Step 10: Adding Toppings (Optional)
Before serving, you can add your favorite toppings to enhance the flavor and presentation of the Chocolate Dream. Sprinkle with chocolate shavings, chopped pecans, fresh berries, chocolate syrup, or mini chocolate chips. Get creative and customize the toppings to your liking.
COOKING Rating:
Easy
Serving Suggestions:
Serve the Chocolate Dream chilled, straight from the refrigerator. Cut it into squares or rectangles and arrange them on a platter. Garnish with additional toppings, if desired. This dessert is perfect for potlucks, parties, picnics, or any occasion where you want to impress your guests with a delicious and easy-to-make treat.
Tips:
- For a richer flavor, use dark chocolate pudding mix instead of regular chocolate pudding.
- To make the crust extra flavorful, toast the pecans in a dry skillet before chopping them.
- If you don’t have pecans, you can substitute walnuts or almonds.
- For a lighter version, use fat-free cream cheese and sugar-free pudding mix.
- You can also make individual Chocolate Dream parfaits by layering the ingredients in glasses or jars.
- Make sure your cream cheese is properly softened before you attempt to cream it.
Prep Time:
15 minutes
Cook Time:
15 minutes
Chill Time:
1 hour
Total Time:
1 hour 30 minutes
Nutritional Information:
(Per serving, approximate)
- Calories: 333 kcal
- Protein: 6 g
- Sodium: 176 mg
Conclusion
The Decadent Chocolate Dream is more than just a dessert; it’s a celebration of flavors and textures that will delight your senses. With its easy preparation, readily available ingredients, and customizable toppings, this recipe is perfect for any occasion. Whether you’re looking for a crowd-pleasing dessert for a potluck or a special treat for your loved ones, the Chocolate Dream is sure to be a hit. So, go ahead and indulge in this layered dessert extravaganza and experience the magic of chocolate, cream cheese, and nuts in perfect harmony.
Questions and Answers about the Chocolate Dream:
Q1: Can I make this dessert ahead of time?
A: Absolutely! In fact, the Chocolate Dream is even better when made a day in advance. This allows the flavors to meld together and the layers to set completely. Just cover it tightly with plastic wrap and store it in the refrigerator until you’re ready to serve.
Q2: Can I use a different type of nut in the crust?
A: Yes, you can definitely experiment with different nuts in the crust. Walnuts, almonds, or even macadamia nuts would be delicious alternatives to pecans. Just make sure to chop them finely and toast them lightly before adding them to the crust mixture to enhance their flavor.
Q3: Can I use homemade whipped cream instead of Cool Whip?
A: While Cool Whip provides a stable and convenient option, you can certainly use homemade whipped cream. Just keep in mind that homemade whipped cream may not hold its shape as well as Cool Whip, so it’s best to add it shortly before serving. To make homemade whipped cream, simply whip heavy cream with powdered sugar and a touch of vanilla extract until stiff peaks form.
Q4: Can I make this dessert gluten-free?
A: Yes, you can easily make this dessert gluten-free by using gluten-free all-purpose flour in the crust. You’ll also want to ensure that the pudding mix you use is gluten-free. Many instant pudding mixes are, but it’s always a good idea to check the label.
Q5: What are some other topping ideas for the Chocolate Dream?
A: The topping possibilities are endless! Besides the suggestions mentioned earlier, you can also try adding crushed Oreo cookies, peanut butter cups, caramel sauce, coconut flakes, or a drizzle of hot fudge. Get creative and experiment with different flavors and textures to create your own unique Chocolate Dream masterpiece.

Decadent Chocolate Dream
Ingredients
- For the Nut Crust:
- 1 cup all-purpose flour
- 1/2 cup 1 stick unsalted butter, melted
- 1/2 cup pecans finely chopped
- For the Whipped Cream Cheese Layer:
- 8 ounces cream cheese softened to room temperature
- 1 cup powdered sugar
- 8 ounces Cool Whip thawed (half of a 16oz tub)
- For the Chocolate Pudding Layer:
- 2 boxes 3.9 ounces each instant chocolate pudding mix
- 3 cups milk
- For the Whipped Topping:
- 8 ounces Cool Whip thawed (remaining half of the 16oz tub)
- Optional Toppings:
- Chocolate shavings
- Chopped pecans
- Fresh berries strawberries, raspberries, or blueberries
- Chocolate syrup
- Mini chocolate chips
Instructions
- Step 1: Preparing the Nut Crust
- Preheat your oven to 350°F (175°C). In a medium-sized mixing bowl, combine the all-purpose flour, melted butter, and chopped pecans. Mix thoroughly until the ingredients are evenly distributed and the mixture resembles coarse crumbs. This is the foundation of your Chocolate Dream, so ensure that all ingredients are well incorporated. The melted butter should bind the flour and pecans together, creating a slightly moist mixture.
- Step 2: Baking the Crust
- Press the nut mixture evenly into the bottom of a 9×13 inch baking dish. Use the back of a spoon or your fingers to create a uniform layer, ensuring that the crust is compact and even. A well-pressed crust will prevent it from crumbling when you slice and serve the dessert. Bake in the preheated oven for 15 minutes, or until the crust is lightly golden brown and fragrant. Keep a close eye on it to prevent burning. The nutty aroma will fill your kitchen, signaling that the crust is ready.
- Step 3: Cooling the Crust
- Remove the baking dish from the oven and allow the crust to cool completely to room temperature. This step is crucial because adding warm layers on top of a hot crust can cause the dessert to become soggy. Cooling the crust allows it to firm up, creating a stable base for the subsequent layers. Place the baking dish on a wire rack to facilitate even cooling. You can speed up the process by placing it in the refrigerator for a short period.
- Step 4: Preparing the Whipped Cream Cheese Layer
- In a large mixing bowl, using an electric mixer, cream together the softened cream cheese and powdered sugar until the mixture is smooth and fluffy. Ensure that the cream cheese is at room temperature to avoid lumps and to achieve a creamy consistency. Beat the mixture on medium speed for about 2-3 minutes until it is light and airy. Then, gently fold in half of the thawed Cool Whip until it is fully incorporated. Be careful not to overmix, as this can cause the Cool Whip to deflate.
- Step 5: Layering the Cream Cheese Mixture
- Scoop the cream cheese mixture on top of the cooled nut crust and spread it evenly. Use a spatula or the back of a spoon to create a smooth, uniform layer. This layer should completely cover the crust, providing a creamy and tangy counterpoint to the other layers. Allow this layer to set in the refrigerator for about 15-20 minutes before adding the chocolate pudding layer. This will help prevent the pudding from seeping into the crust.
- Step 6: Preparing the Chocolate Pudding Layer
- In a separate mixing bowl, whisk together the instant chocolate pudding mixes and milk until well combined and smooth. Follow the instructions on the pudding mix box for the best results. Continue whisking for about 2 minutes until the pudding starts to thicken. The mixture should be free of lumps and have a smooth, velvety texture.
- Step 7: Layering the Chocolate Pudding
- Gently pour the chocolate pudding mixture over the cream cheese layer. Spread it evenly using a spatula or the back of a spoon, ensuring that all of the cream cheese is covered. This will create a rich and decadent chocolate layer that complements the creamy and nutty flavors of the other layers. Be gentle when spreading the pudding to avoid disturbing the cream cheese layer.
- Step 8: Adding the Whipped Topping
- Carefully spread the remaining Cool Whip (the other half of the tub) on top of the chocolate pudding layer. Create a smooth and even layer that covers the entire surface of the dessert. You can use a spatula or a piping bag to achieve a decorative finish.
- Step 9: Chilling and Setting
- Cover the baking dish with plastic wrap and chill the completed Chocolate Dream in the refrigerator for at least 1 hour, or preferably longer, to allow all the layers to set completely. The longer it chills, the better the flavors will meld together and the easier it will be to slice and serve.
- Step 10: Adding Toppings (Optional)
- Before serving, you can add your favorite toppings to enhance the flavor and presentation of the Chocolate Dream. Sprinkle with chocolate shavings, chopped pecans, fresh berries, chocolate syrup, or mini chocolate chips. Get creative and customize the toppings to your liking.

