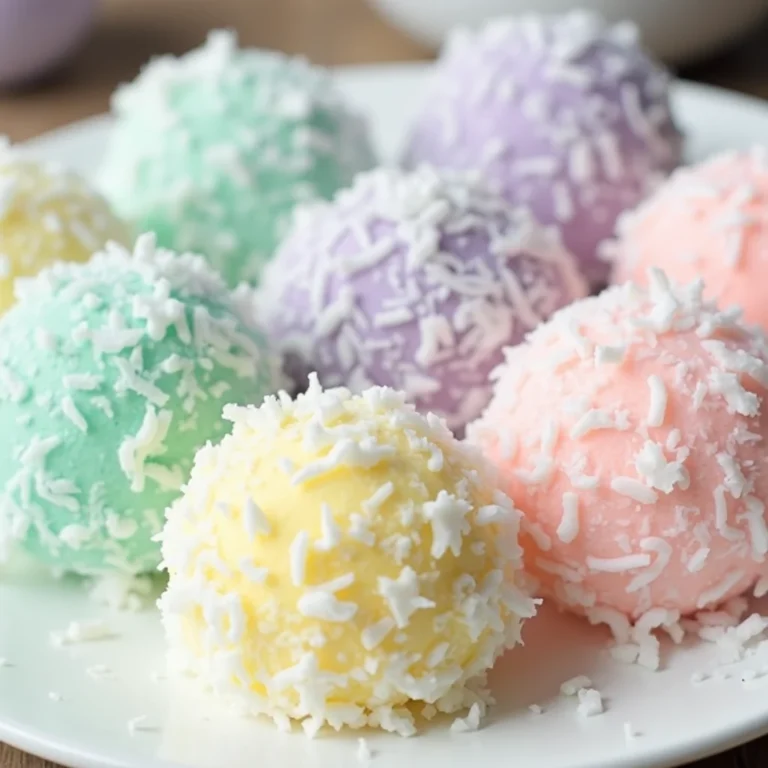
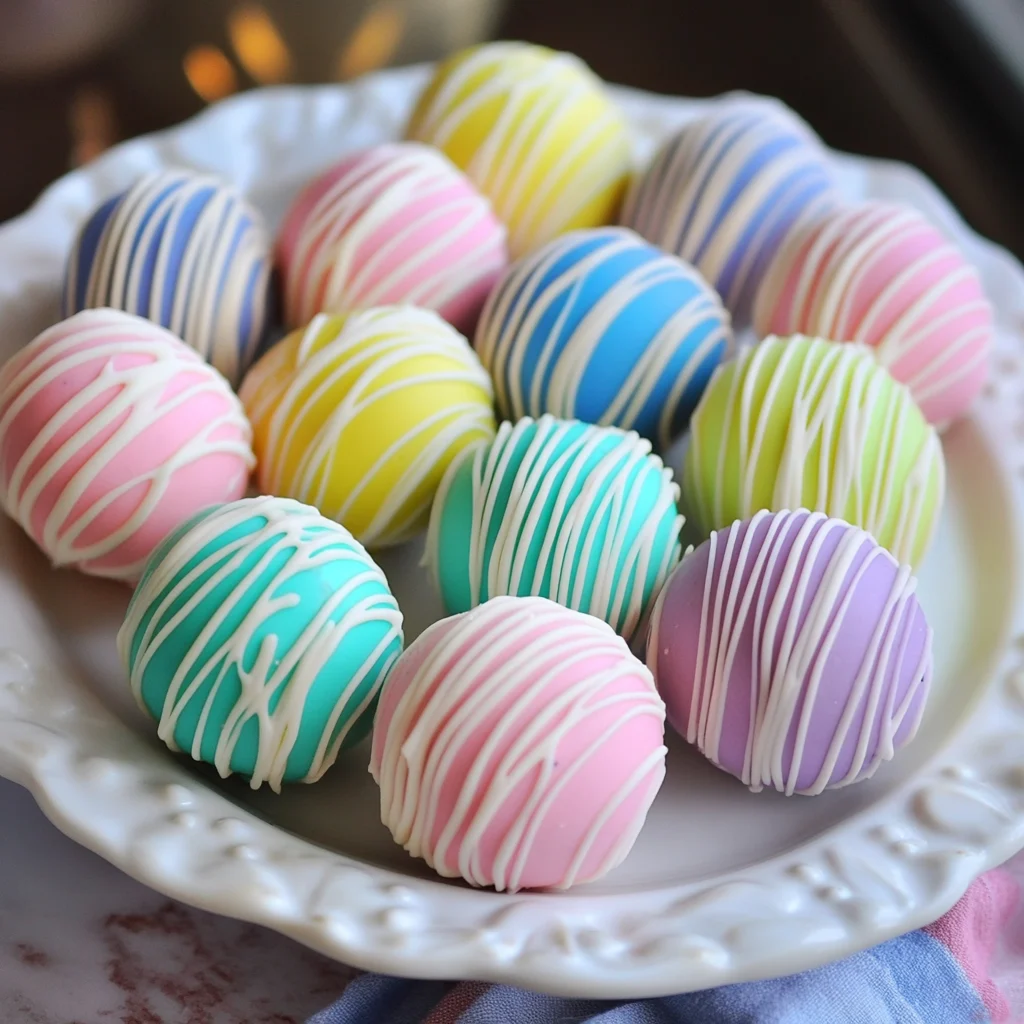
Easter Egg Oreo Cookie Balls
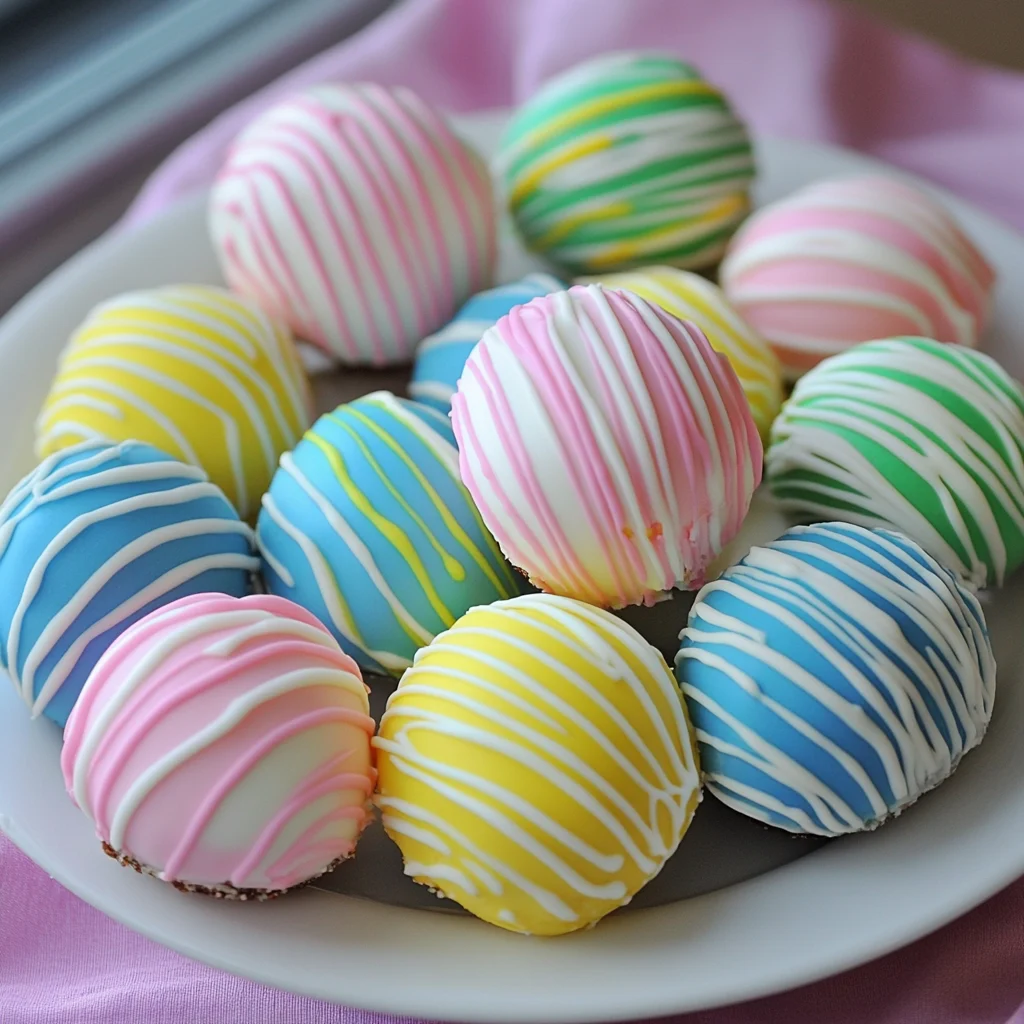
Description: These Easter Egg Oreo Cookie Balls are a delightful, no-bake treat perfect for celebrating Easter. Combining the classic flavor of Golden Oreos with creamy cream cheese, these bite-sized eggs are dipped in smooth white candy coating and decorated with vibrant colors, making them a fun and festive activity for kids and adults alike.
Why You’ll Love This Recipe:
- No-Bake Convenience: Skip the oven! These cookie balls require no baking, making them a quick and easy dessert option.
- Kid-Friendly Fun: Involve the little ones in every step, from crushing the cookies to decorating the finished eggs.
- Customizable Decorations: Let your creativity shine! Choose your favorite colors and designs to create unique Easter Egg masterpieces.
- Deliciously Addictive: The perfect balance of sweet and creamy, these cookie balls are sure to be a crowd-pleaser.
- Perfect for Gifting: Package them in a cute box or basket for a thoughtful Easter gift for friends and family.
Introduction
Easter is a time for joy, family gatherings, and of course, delicious treats! While traditional Easter desserts like carrot cake and pastel-colored cookies are always a hit, why not try something a little different and equally fun? These Easter Egg Oreo Cookie Balls are the perfect addition to your Easter celebration. They are incredibly simple to make, require no baking, and are a guaranteed hit with both kids and adults.
The combination of Golden Oreos and cream cheese creates a rich and creamy filling that’s perfectly complemented by the smooth sweetness of the white candy coating. The best part? Decorating these little eggs is a blank canvas for your creativity. Use a variety of colors and piping techniques to create unique and personalized designs that will impress your guests.
Whether you’re looking for a fun activity to do with your kids, a delicious dessert to bring to a potluck, or a sweet treat to give as a gift, these Easter Egg Oreo Cookie Balls are the perfect choice. So gather your ingredients, get your aprons on, and let’s get started!
Ingredients:
- 14.3 oz package (36 cookies) Golden Oreos, crushed into crumbs
- 8 oz cream cheese, room temperature
- 10 oz white candy coating
- Additional 1 oz of white candy coating per color, for decorating
- Gel icing colors (assorted colors of your choice)
Preparation:
Step 1: Crush the Oreos:
Begin by crushing the Golden Oreos into fine crumbs. You can use a food processor for this, pulsing until the cookies are finely ground. Alternatively, you can place the cookies in a resealable bag and use a rolling pin to crush them. Just make sure the crumbs are as fine as possible to ensure a smooth texture in the final product.
Step 2: Combine Oreo Crumbs and Cream Cheese:
In a large mixing bowl, combine the crushed Oreo crumbs and the softened cream cheese. Make sure the cream cheese is at room temperature, as this will make it much easier to mix. Use a spatula or an electric mixer to thoroughly combine the ingredients until a smooth, dough-like mixture forms. The mixture should be cohesive enough to easily form into balls.
Step 3: Form Easter Egg Shapes:
Using a tablespoon or a small cookie scoop, portion out about 1 1/2 tablespoons of the Oreo mixture. Roll each portion into a ball, then gently shape it into an Easter egg form. You can create a more realistic egg shape by slightly flattening the bottom of the ball and tapering the top. Place the formed eggs on a baking sheet lined with parchment paper.
Step 4: Chill the Eggs:
Place the baking sheet with the Oreo eggs in the refrigerator for at least one hour. Chilling the eggs will help them firm up and make them easier to dip in the candy coating without falling apart. This step is crucial for maintaining the shape of the eggs and preventing them from becoming too soft.
Step 5: Dip in Candy Coating:
Once the Oreo eggs have been chilled, prepare the white candy coating. Melt the 10 ounces of white candy coating according to the package directions. This usually involves microwaving the candy coating in short intervals, stirring in between, until completely melted and smooth.
Using a fork or a toothpick, carefully dip each chilled Oreo egg into the melted candy coating, ensuring it is fully coated. Gently tap off any excess candy coating. Place the dipped eggs back on the parchment paper-lined baking sheet. If using a toothpick, insert it into the bottom of the egg before dipping. After dipping and placing the egg, gently twist the toothpick while pulling it out. Use a small dab of melted candy coating to fill in the hole left by the toothpick.
Step 6: Decorate the Eggs:
Once the candy coating has set (this usually takes about 15-20 minutes), it’s time to decorate! Melt the remaining 1 ounce of white candy coating for each color you plan to use. Add a few drops of gel food coloring to each melted batch, stirring until you achieve your desired shade.
Transfer the colored candy coating to piping bags or small resealable bags with the corner snipped off. Pipe or drizzle the colored candy coating over the Oreo eggs in various patterns and designs. You can create stripes, polka dots, swirls, or any other design you can imagine. Get creative and have fun with it!
You can also use sprinkles, edible glitter, or other decorative toppings to add extra flair to your Easter Egg Oreo Cookie Balls.
Step 7: Store the Cookie Balls:
Once the decorations have set, store the Easter Egg Oreo Cookie Balls in an airtight container in the refrigerator. They will stay fresh for up to one week.
COOKING Rating:
Easy
Serving Suggestions:
- Serve as a festive dessert at your Easter brunch or dinner.
- Package them in a decorative box or basket as a thoughtful Easter gift.
- Arrange them on a platter as a centerpiece for your Easter table.
- Include them in Easter baskets for a sweet surprise.
- Enjoy them as a fun and delicious snack any time of day.
Tips:
- Use high-quality candy coating: This will ensure a smooth and even coating for your Oreo eggs.
- Don’t overheat the candy coating: Overheating can cause the candy coating to seize up and become difficult to work with.
- Chill the Oreo eggs thoroughly: This will help them maintain their shape during the dipping process.
- Work quickly when decorating: The candy coating sets quickly, so be prepared to decorate immediately after dipping.
- Get creative with your decorations: Don’t be afraid to experiment with different colors, patterns, and toppings.
- Use gel food coloring: Gel food coloring is more concentrated than liquid food coloring, so it won’t thin out the candy coating.
- Melt the candy coating in small batches: This will prevent it from hardening before you have a chance to use it.
- Use a toothpick for dipping: A toothpick is a great tool for dipping the Oreo eggs without leaving fingerprints on the candy coating.
Prep Time:
30 minutes
Cook Time:
0 minutes
Total Time:
3 hours (including chilling time)
Nutritional Information:
Serving Size: 1 egg
Calories: 132
Protein: 1.6 g
Sodium: 56.3 mg
Conclusion
These Easter Egg Oreo Cookie Balls are a fun, festive, and delicious way to celebrate Easter. They’re easy to make, require no baking, and can be customized to your liking. Whether you’re making them with your kids, bringing them to a potluck, or giving them as gifts, these cookie balls are sure to be a hit. So get in the kitchen and start creating your own Easter Egg masterpieces!
Questions and Answers:
Q1: Can I use regular Oreos instead of Golden Oreos?
A: Absolutely! While the recipe calls for Golden Oreos, you can definitely substitute regular Oreos if that’s what you have on hand or prefer. Keep in mind that the color will be different, so the final appearance of the cookie balls will be darker. You might also want to reduce the amount of cream cheese slightly, as regular Oreos tend to be slightly drier than Golden Oreos.
Q2: What can I use if I don’t have candy coating?
A: If you don’t have candy coating, you can use white chocolate instead. However, keep in mind that white chocolate is more prone to melting at room temperature, so you’ll need to keep the finished cookie balls refrigerated. Make sure to use a good quality white chocolate for the best flavor and texture.
Q3: Can I make these ahead of time?
A: Yes, you can definitely make these ahead of time! In fact, it’s recommended that you chill the cookie balls for at least an hour before dipping them in the candy coating. The finished cookie balls can be stored in an airtight container in the refrigerator for up to one week.
Q4: How can I prevent the candy coating from cracking?
A: To prevent the candy coating from cracking, make sure the Oreo eggs are thoroughly chilled before dipping them. Also, avoid dipping the eggs in candy coating that is too hot. If the candy coating is too hot, it can cause the eggs to crack as they cool.
Q5: Can I use different colors for the base coating instead of just white?
A: Certainly! Feel free to get creative and use different colors for the base coating. You can melt different colors of candy coating or even mix a small amount of gel food coloring into white candy coating to create your desired hue. Just be sure to melt each color separately and work quickly to prevent the candy coating from hardening.

Easter Egg Oreo Cookie Balls
Ingredients
- 14.3 oz package 36 cookies Golden Oreos, crushed into crumbs
- 8 oz cream cheese room temperature
- 10 oz white candy coating
- Additional 1 oz of white candy coating per color for decorating
- Gel icing colors assorted colors of your choice
Instructions
- Step 1: Crush the Oreos:
- Begin by crushing the Golden Oreos into fine crumbs. You can use a food processor for this, pulsing until the cookies are finely ground. Alternatively, you can place the cookies in a resealable bag and use a rolling pin to crush them. Just make sure the crumbs are as fine as possible to ensure a smooth texture in the final product.
- Step 2: Combine Oreo Crumbs and Cream Cheese:
- In a large mixing bowl, combine the crushed Oreo crumbs and the softened cream cheese. Make sure the cream cheese is at room temperature, as this will make it much easier to mix. Use a spatula or an electric mixer to thoroughly combine the ingredients until a smooth, dough-like mixture forms. The mixture should be cohesive enough to easily form into balls.
- Step 3: Form Easter Egg Shapes:
- Using a tablespoon or a small cookie scoop, portion out about 1 1/2 tablespoons of the Oreo mixture. Roll each portion into a ball, then gently shape it into an Easter egg form. You can create a more realistic egg shape by slightly flattening the bottom of the ball and tapering the top. Place the formed eggs on a baking sheet lined with parchment paper.
- Step 4: Chill the Eggs:
- Place the baking sheet with the Oreo eggs in the refrigerator for at least one hour. Chilling the eggs will help them firm up and make them easier to dip in the candy coating without falling apart. This step is crucial for maintaining the shape of the eggs and preventing them from becoming too soft.
- Step 5: Dip in Candy Coating:
- Once the Oreo eggs have been chilled, prepare the white candy coating. Melt the 10 ounces of white candy coating according to the package directions. This usually involves microwaving the candy coating in short intervals, stirring in between, until completely melted and smooth.
- Using a fork or a toothpick, carefully dip each chilled Oreo egg into the melted candy coating, ensuring it is fully coated. Gently tap off any excess candy coating. Place the dipped eggs back on the parchment paper-lined baking sheet. If using a toothpick, insert it into the bottom of the egg before dipping. After dipping and placing the egg, gently twist the toothpick while pulling it out. Use a small dab of melted candy coating to fill in the hole left by the toothpick.
- Step 6: Decorate the Eggs:
- Once the candy coating has set (this usually takes about 15-20 minutes), it’s time to decorate! Melt the remaining 1 ounce of white candy coating for each color you plan to use. Add a few drops of gel food coloring to each melted batch, stirring until you achieve your desired shade.
- Transfer the colored candy coating to piping bags or small resealable bags with the corner snipped off. Pipe or drizzle the colored candy coating over the Oreo eggs in various patterns and designs. You can create stripes, polka dots, swirls, or any other design you can imagine. Get creative and have fun with it!
- You can also use sprinkles, edible glitter, or other decorative toppings to add extra flair to your Easter Egg Oreo Cookie Balls.
- Step 7: Store the Cookie Balls:
- Once the decorations have set, store the Easter Egg Oreo Cookie Balls in an airtight container in the refrigerator. They will stay fresh for up to one week.