Easter Fudge

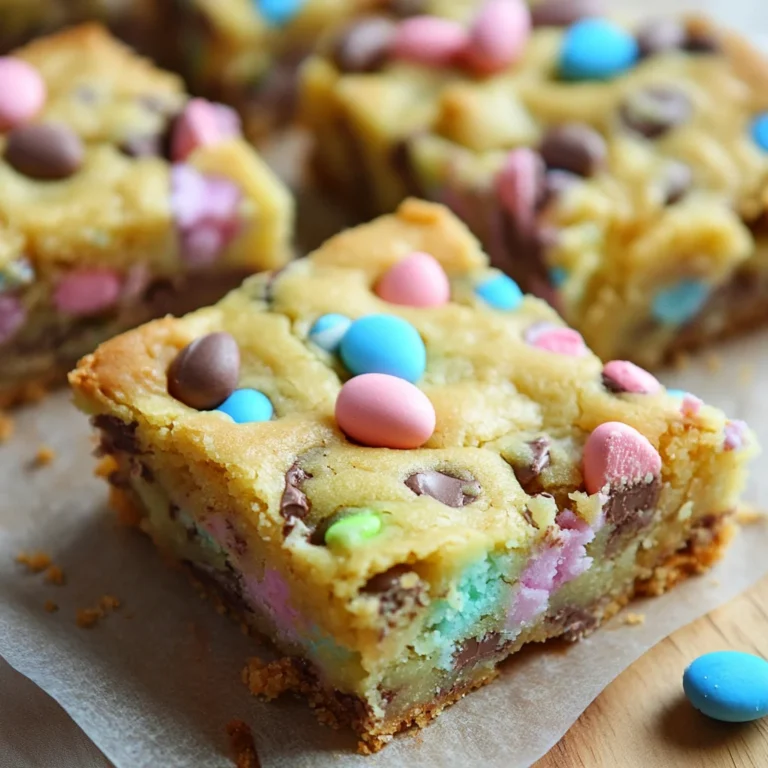
Description: This Easter Fudge recipe is a simple yet stunning treat that captures the essence of springtime. Creamy white chocolate fudge is studded with colorful, candy-coated chocolates, creating a delightful combination of textures and flavors. It’s perfect for Easter baskets, spring gatherings, or a sweet indulgence any time of year.
Why You Will Love This Recipe: This fudge is incredibly easy to make, requiring minimal effort and ingredients. The vibrant colors and festive decorations make it visually appealing, while the rich, creamy flavor is sure to please everyone. Its no-bake nature makes it an ideal treat for busy schedules, and it’s a wonderful way to get kids involved in the kitchen. It’s also easily customizable, allowing you to adapt it to your preferences and available ingredients.
Introduction
Easter is a time for joy, family, and, of course, delicious treats! While traditional Easter eggs and bunny-shaped chocolates are always a hit, why not add a touch of homemade charm to your celebrations with this irresistible Easter Fudge? This recipe is a foolproof way to create a show-stopping dessert that’s both beautiful and incredibly delicious. The combination of smooth, melt-in-your-mouth white chocolate fudge and the satisfying crunch of candy-coated chocolates creates a textural delight that’s hard to resist. Plus, the pastel colors and festive sprinkles perfectly capture the spirit of the season. Whether you’re looking for a simple yet impressive dessert to share with loved ones or a fun baking project to do with kids, this Easter Fudge is the perfect choice. Get ready to spread some springtime sweetness with this delightful recipe!
Ingredients:
- 3 cups white chocolate chips: High-quality white chocolate chips are essential for a smooth, creamy fudge. Avoid using chocolate chips that are too old, as they may not melt as easily and can affect the texture of the fudge.
- 1 can (14 oz) sweetened condensed milk: Sweetened condensed milk is the key to creating the fudge’s rich, dense texture. It adds sweetness and helps to bind the ingredients together. Make sure to use sweetened condensed milk, not evaporated milk.
- 1 teaspoon vanilla extract: A touch of vanilla extract enhances the flavor of the white chocolate and adds a subtle warmth to the fudge. Use pure vanilla extract for the best results.
- 1 cup pastel-colored candy-coated chocolates (like Mini Eggs or M&M’s): These chocolates add a delightful crunch and pops of color to the fudge. Mini Eggs and pastel M&M’s are perfect for Easter, but you can use any type of candy-coated chocolate you prefer.
- Pastel sprinkles (optional, for decoration): Pastel sprinkles add a festive touch and extra visual appeal to the fudge. Choose sprinkles that complement the colors of the candy-coated chocolates.

Preparation:
Step 1: Prepare the Pan
Line an 8×8-inch baking dish with parchment paper, leaving some overhang on the sides. This makes it easy to lift the fudge out of the pan once it’s set, preventing it from sticking and making it easier to cut into clean squares. Make sure the parchment paper covers the bottom and all sides of the pan. The overhang is crucial; without it, removing the fudge will be a nightmare. Consider using binder clips to secure the parchment paper to the sides of the pan if it’s not staying in place.
Step 2: Melt the Chocolate
In a microwave-safe bowl, combine the white chocolate chips and sweetened condensed milk. Microwave in 30-second intervals, stirring well in between each interval, until the chocolate is smooth and fully melted. This process is crucial for achieving the right consistency. Microwaving in short bursts prevents the chocolate from burning or seizing up. Make sure to stir thoroughly after each interval to distribute the heat evenly. If you prefer, you can melt the chocolate and sweetened condensed milk in a double boiler over simmering water. The double boiler method provides a more controlled heat and can prevent burning, but it takes longer.
Step 3: Mix & Add the Candy
Once the chocolate mixture is smooth and melted, stir in the vanilla extract. The vanilla extract enhances the overall flavor profile of the fudge, adding a touch of warmth and complexity. Next, gently fold in half of the pastel-colored chocolates. Be careful not to overmix, as this can cause the chocolate to seize up. The goal is to distribute the chocolates evenly throughout the fudge without crushing them. Reserve the other half of the chocolates for topping the fudge later.
Step 4: Assemble & Chill
Pour the fudge mixture into the prepared baking dish and spread it evenly. Use a spatula or offset spreader to smooth the surface of the fudge. Sprinkle the remaining pastel-colored chocolates and pastel sprinkles on top, pressing them lightly into the fudge so they adhere. This will create a visually appealing and festive finish. Cover the baking dish with plastic wrap and refrigerate for at least 2 hours, or until the fudge is firm. Chilling is essential for the fudge to set properly and become firm enough to cut into squares.
Step 5: Cut and Serve
Once the fudge is firm, lift it out of the baking dish using the parchment paper overhang. Place the fudge on a cutting board and cut it into 16 equal squares using a sharp knife. For clean cuts, run the knife under hot water and wipe it dry between each cut. Serve the Easter Fudge and enjoy!
COOKING Rating: Easy
Serving Suggestions:
- Easter Baskets: This fudge makes a perfect addition to Easter baskets for kids and adults alike.
- Spring Gatherings: Serve the fudge at Easter brunch, spring picnics, or any springtime gathering.
- Dessert Platter: Include the fudge on a dessert platter alongside other Easter treats like cookies, cupcakes, and macarons.
- Gift Giving: Package the fudge in a decorative box or bag to give as a homemade gift.
- Enjoy with Coffee or Tea: The rich, creamy fudge pairs perfectly with a warm cup of coffee or tea.
Tips:
- Use High-Quality Ingredients: Using high-quality white chocolate chips and pure vanilla extract will result in a more flavorful and delicious fudge.
- Don’t Overcook the Chocolate: Be careful not to overheat the chocolate when melting it, as this can cause it to seize up and become grainy. Microwave in short intervals and stir frequently.
- Customize the Candy: Feel free to use any type of candy-coated chocolate you prefer, such as different colors of M&M’s, Reese’s Pieces, or even chopped-up chocolate bars.
- Add a Layer of Salted Caramel: Drizzle a thin layer of salted caramel over the fudge before adding the toppings for an extra layer of flavor.
- Store Properly: Store the fudge in an airtight container in the refrigerator for up to 1 week.
Prep Time: 10 minutes
Cook Time: 0 minutes (no-bake)
Chill Time: 2 hours
Total Time: 2 hours 10 minutes
Nutritional Information:
(Approximate values per serving)
- Calories: 180 kcal
- Protein: 1 gram
- Sodium: 20 mg
Conclusion
This Easter Fudge recipe is a delightful and easy way to bring a touch of springtime sweetness to your celebrations. With its creamy white chocolate base, colorful candy toppings, and simple preparation, it’s a recipe that everyone will love. Whether you’re making it for Easter baskets, spring gatherings, or simply to satisfy your sweet tooth, this fudge is sure to be a hit. So gather your ingredients, get creative with your toppings, and enjoy the process of creating this decadent and festive treat! Happy Easter baking!
Questions & Answers:
Q1: Can I use a different type of chocolate instead of white chocolate?
A1: Absolutely! While this recipe is designed for white chocolate, you can easily adapt it to use milk chocolate, dark chocolate, or even a combination of different chocolates. Keep in mind that using a different type of chocolate will change the flavor and color of the fudge. For example, using dark chocolate will result in a richer, less sweet fudge with a darker color. Adjust the amount of vanilla extract to complement the chocolate you choose.
Q2: What if I don’t have sweetened condensed milk? Can I substitute it with something else?
A2: Sweetened condensed milk is essential for the structure and texture of this fudge, and it’s difficult to substitute it directly. It provides the perfect level of sweetness and the binding needed to create a firm but creamy fudge. While you could try making your own sweetened condensed milk from scratch, the results may not be consistent. It’s best to purchase a can of sweetened condensed milk for this recipe.
Q3: How do I prevent the chocolate from seizing up when melting it?
A3: Seizing can happen when even a small amount of water comes into contact with melted chocolate, causing it to become grainy and stiff. To prevent this, ensure that your bowl and utensils are completely dry before melting the chocolate. When microwaving, melt the chocolate in short intervals (30 seconds) and stir thoroughly in between each interval. This helps to distribute the heat evenly and prevent overheating, which can also cause seizing. If you’re using a double boiler, make sure the bottom of the bowl doesn’t touch the simmering water.
Q4: Can I add other ingredients besides candy-coated chocolates?
A4: Absolutely! This fudge is a blank canvas for your creativity. You can add other ingredients like chopped nuts (pecans, walnuts, or almonds), dried cranberries, mini marshmallows, pretzels, or even a swirl of peanut butter. Just be sure to add these ingredients after the chocolate is melted and before you pour the mixture into the baking dish. Don’t overload the fudge with too many add-ins, as this can make it difficult to cut and can affect the overall texture.
Q5: How long does the fudge last, and how should I store it?
A5: This Easter Fudge will last for up to 1 week when stored properly in the refrigerator. To store it, cut the fudge into squares and place it in an airtight container. You can layer the fudge with parchment paper to prevent it from sticking together. Avoid storing the fudge at room temperature, as it will soften and become sticky. For longer storage, you can freeze the fudge for up to 2 months. Wrap the fudge tightly in plastic wrap and then place it in a freezer-safe container. Thaw the fudge in the refrigerator before serving.