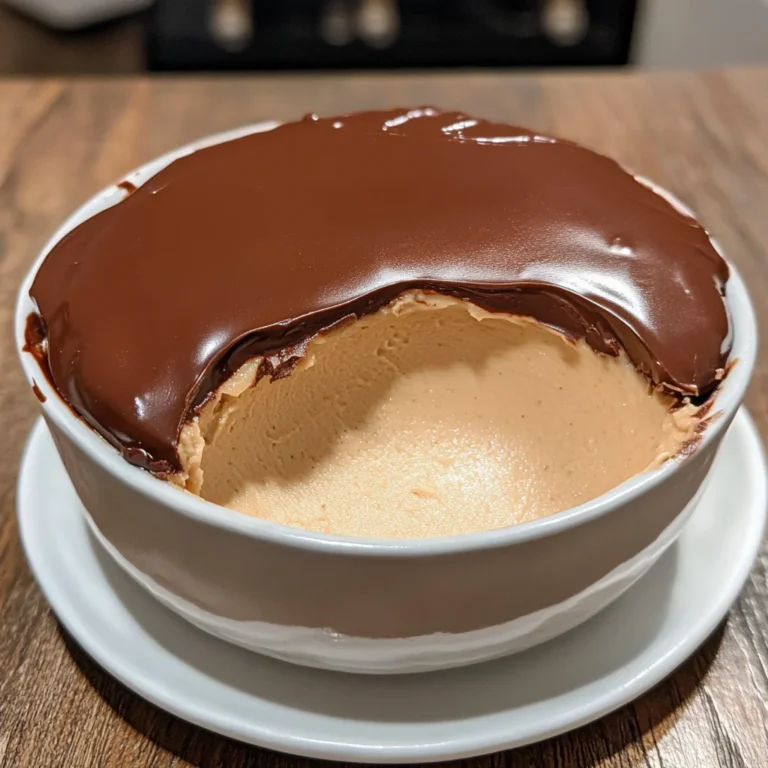
Magic Lemon Cobbler

Description of this recipe: This Magic Lemon Cobbler isn’t just a dessert; it’s a culinary enchantment! Imagine a tangy, bright lemon pie filling transforming into a luscious, gooey sauce beneath a golden-brown, buttery cobbler crust. The secret? No pre-mixing! The batter and filling magically separate during baking, creating distinct layers of flavor and texture that will leave you spellbound. This is comfort food elevated, a simple yet stunning dessert perfect for weeknights or special occasions.
Why you will love this recipe:
- Effortless Elegance: This recipe requires minimal effort for maximum impact. The magic happens in the oven, creating a dessert that looks and tastes far more complex than it is.
- Tangy-Sweet Perfection: The combination of tart lemon filling and rich, buttery cobbler is simply divine. It’s a symphony of flavors that will tantalize your taste buds.
- Versatile and Adaptable: Feel free to customize this recipe with your favorite toppings, fruits, or extracts. It’s a blank canvas for your culinary creativity.
- Crowd-Pleasing Delight: This cobbler is guaranteed to be a hit with everyone who tries it. It’s a comforting, nostalgic dessert that evokes feelings of warmth and happiness.
- Year-Round Appeal: While the bright lemon flavor makes it perfect for spring and summer, the comforting warmth of the cobbler makes it equally enjoyable during colder months.
Introduction
There’s something undeniably magical about desserts that seem to defy the laws of baking. This Magic Lemon Cobbler is one such marvel. It’s a dish where simplicity meets deliciousness, where a few humble ingredients transform into a dessert that is both comforting and elegant.
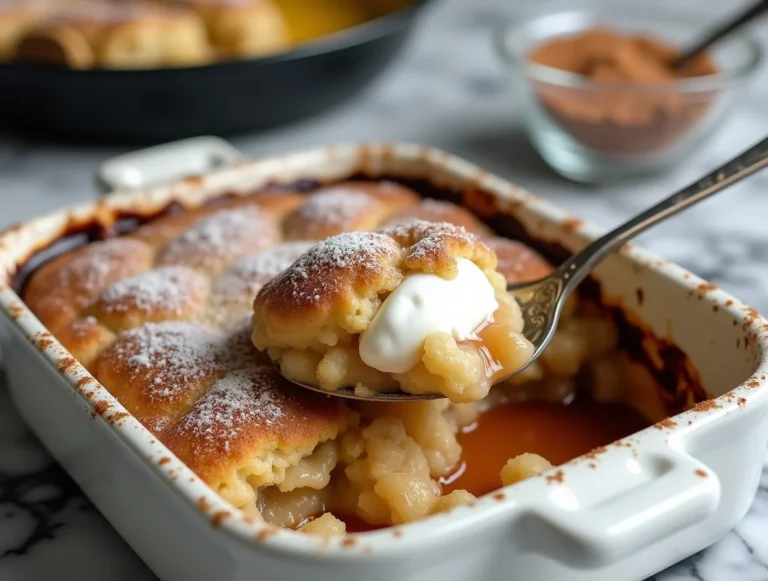
The concept is wonderfully straightforward: a buttermilk-based cobbler batter is poured over melted butter in a baking dish, then dolloped with a generous layer of tangy lemon pie filling. The real magic, however, unfolds in the oven. As the cobbler bakes, the batter rises to form a golden-brown crust, while the lemon filling settles to the bottom, creating a luscious, pudding-like sauce that perfectly complements the buttery top.
This recipe is a testament to the power of simple ingredients and clever techniques. It’s a dessert that’s perfect for busy weeknights, impromptu gatherings, or any time you’re craving a little bit of culinary magic. Prepare to be amazed as this effortless cobbler transforms into a dessert that’s both visually stunning and incredibly delicious. Let’s conjure up some kitchen magic!
Ingredients:
- 1/2 cup (1 stick) unsalted butter
- 1 cup all-purpose flour
- 1 1/2 teaspoons baking powder
- 1/4 teaspoon salt
- 1 cup granulated sugar
- 1 cup buttermilk (or whole milk)
- 1 teaspoon vanilla extract
- 1 teaspoon lemon extract (optional, for enhanced lemon flavor)
- 21 ounce can lemon pie filling (or lemon curd)

Preparation:
Step 1: Preheat and Prepare the Baking Dish
Begin by preheating your oven to 350°F (175°C). Place the stick of unsalted butter in a 9×9 inch baking dish (or a similar-sized oven-safe dish). Place the baking dish with the butter in the preheated oven for approximately 3-4 minutes, or until the butter is completely melted. Keep a close eye on it to ensure the butter doesn’t brown or burn. Once melted, carefully remove the baking dish from the oven. The melted butter will form the base of our magical cobbler.
Step 2: Whisk Together the Dry Ingredients
In a medium-sized bowl, whisk together the dry ingredients: all-purpose flour, baking powder, salt, and granulated sugar. Whisking is crucial to ensure that the baking powder is evenly distributed, which will help the cobbler rise properly and create a light and airy texture. This step also helps to break up any lumps in the flour or sugar, resulting in a smoother batter.
Step 3: Incorporate the Wet Ingredients
Add the wet ingredients—buttermilk, vanilla extract, and (if using) lemon extract—to the bowl containing the dry ingredients. Gently whisk until a smooth batter forms. Avoid overmixing, as this can develop the gluten in the flour and result in a tough cobbler. The batter should be relatively thin and pourable.
Step 4: Assemble the Cobbler
Pour the batter evenly over the melted butter in the baking dish. Do not stir! This is a crucial step. The magic of this cobbler lies in the separation of the batter and the butter. The melted butter will create a rich, buttery crust on the bottom of the cobbler, while the batter will rise and form the top layer.
Step 5: Add the Lemon Filling
Spoon the lemon pie filling (or lemon curd) evenly over the batter. Again, do not stir! Distribute the lemon filling in dollops across the batter, ensuring that it’s spread out evenly. The filling will sink to the bottom during baking, creating a luscious, pudding-like layer beneath the cobbler.
Step 6: Bake the Cobbler
Place the baking dish in the preheated oven and bake for 45-55 minutes, or until the cobbler is puffed and golden brown around the edges. The baking time may vary depending on your oven, so it’s essential to keep a close eye on it. The cobbler is done when a toothpick inserted into the center comes out clean or with just a few moist crumbs.
Step 7: Cool and Serve
Remove the cobbler from the oven and let it cool slightly before serving. As it cools, the lemon filling will thicken slightly, creating a delightful contrast with the warm, buttery cobbler crust.
COOKING Rating:
- Ease: Easy
- Flavor: Excellent
- Presentation: Attractive
Serving Suggestions:
- Serve warm, topped with a dollop of freshly whipped cream or a scoop of vanilla ice cream.
- Garnish with lemon slices, a dusting of powdered sugar, or a sprinkle of lemon zest for added visual appeal and flavor.
- A drizzle of honey or maple syrup can also enhance the sweetness of the cobbler.
- For a more decadent treat, serve with a side of lemon curd or a scoop of lemon sorbet.
Tips:
- Use high-quality ingredients: The flavor of this cobbler relies heavily on the quality of the ingredients. Use fresh, high-quality butter, buttermilk, and lemon pie filling for the best results.
- Don’t overmix the batter: Overmixing can result in a tough cobbler. Mix the batter just until the ingredients are combined.
- Don’t stir the batter and filling: The magic of this cobbler lies in the separation of the batter and the filling. Avoid stirring the batter or the filling, as this will prevent the layers from forming properly.
- Adjust baking time as needed: Baking times may vary depending on your oven. Check the cobbler after 45 minutes and adjust the baking time as needed.
- Let it cool slightly before serving: Allowing the cobbler to cool slightly before serving will allow the lemon filling to thicken and the flavors to meld together.
Prep Time: 15 minutes
Cook Time: 55 minutes
Total Time: 1 hour 10 minutes
Nutritional Information:
(Note: Nutritional information is an estimate and may vary based on specific ingredients used.)
- Calories: Approximately 450-550 per serving
- Protein: Approximately 5-7 grams per serving
- Sodium: Approximately 200-300 mg per serving
Conclusion
This Magic Lemon Cobbler is more than just a dessert; it’s an experience. It’s the joy of watching simple ingredients transform into something extraordinary, the satisfaction of creating a dish that delights both the eyes and the palate, and the comforting warmth of a homemade treat shared with loved ones. With its tangy lemon filling, buttery cobbler crust, and effortless preparation, this recipe is sure to become a new favorite in your kitchen. So, gather your ingredients, preheat your oven, and prepare to be amazed by the magic of this Lemon Cobbler!
Questions and Answers about this recipe:
Q1: Can I use a different type of fruit filling besides lemon?
A: Absolutely! The beauty of this “magic” cobbler recipe lies in its adaptability. While lemon provides a bright and tangy flavor, you can easily substitute it with other fruit fillings like blueberry, cherry, apple, peach, or even a mixed berry compote. Just ensure the filling is of a similar consistency to lemon pie filling or curd, and adjust the sweetness accordingly if using fresh fruit. For instance, if using fresh blueberries, consider adding a touch of sugar and cornstarch to thicken the filling slightly.
Q2: Can I make this recipe ahead of time?
A: While this cobbler is best enjoyed warm and fresh from the oven, you can prepare the batter and filling separately ahead of time. Store the batter in an airtight container in the refrigerator for up to 24 hours, and keep the lemon filling in a separate container. When ready to bake, pour the batter over the melted butter in the baking dish, dollop with the lemon filling, and bake as directed. Keep in mind that the batter may thicken slightly in the refrigerator, so you might need to add a tablespoon or two of milk to thin it out before baking.
Q3: I don’t have buttermilk. Can I use a substitute?
A: Yes, you can easily substitute buttermilk in this recipe. A common substitute is to add one tablespoon of white vinegar or lemon juice to a measuring cup, then fill the cup with regular milk to equal one cup. Let it sit for 5-10 minutes to curdle slightly, then use it in the recipe. Alternatively, you can use plain yogurt or sour cream thinned with a little milk or water until it reaches a similar consistency to buttermilk.
Q4: My cobbler isn’t browning on top. What can I do?
A: If your cobbler isn’t browning sufficiently, you can try increasing the oven temperature slightly for the last 10-15 minutes of baking, keeping a close watch to prevent burning. You can also broil the cobbler for a minute or two to encourage browning, but be extremely careful not to burn it. Another trick is to brush the top of the cobbler with melted butter or a mixture of egg yolk and milk before baking, which will help it brown beautifully.
Q5: Can I use a different size baking dish?
A: While a 9×9 inch baking dish is ideal for this recipe, you can use a slightly larger or smaller dish if needed. If using a smaller dish, the cobbler will be thicker and may require a longer baking time. If using a larger dish, the cobbler will be thinner and may bake faster. Keep an eye on the cobbler and adjust the baking time accordingly. You can also use individual ramekins for a more elegant presentation, adjusting the baking time as needed. Just make sure the dish you select is oven-safe!