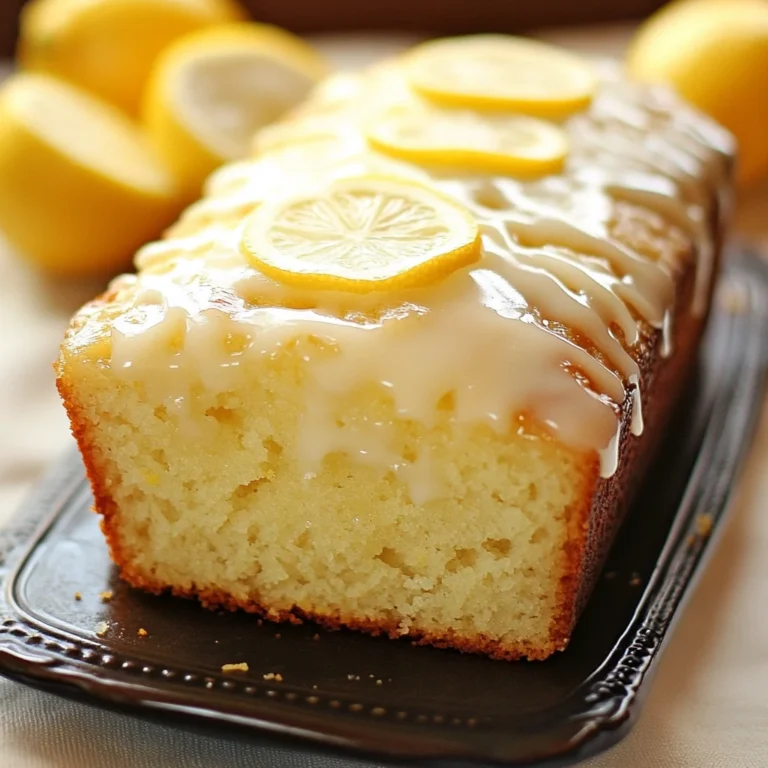
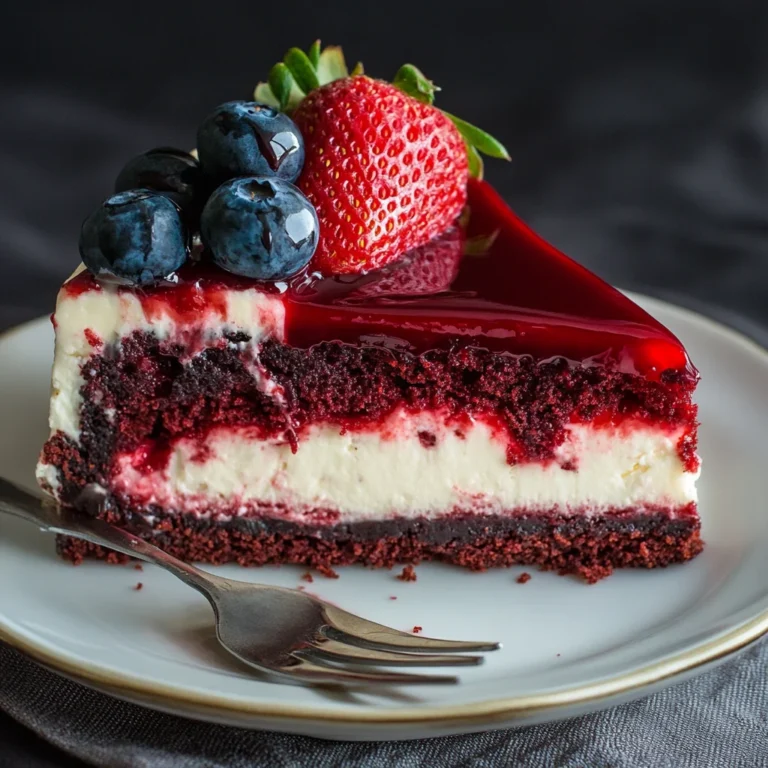
Pineapple Heaven Cake

Description of this recipe: Indulge in a slice of sunshine with this incredibly moist and flavorful Pineapple Heaven Cake. This cake isn’t just a dessert; it’s an experience, a taste of the tropics that will transport you to a sandy beach with every bite. The combination of sweet pineapple, tangy sour cream, and a delicate vanilla hint creates a symphony of flavors that is both comforting and refreshing. Topped with a simple yet elegant pineapple glaze, this cake is perfect for any occasion, from a casual afternoon tea to a festive celebration.
Why you will love this recipe: You’ll fall head-over-heels for this Pineapple Heaven Cake because it’s unbelievably easy to make and always a crowd-pleaser. Unlike some finicky baking recipes, this one is straightforward and forgiving, making it ideal for both novice and experienced bakers. The cake’s incredibly moist texture, achieved through the magic of sour cream and pineapple, ensures it stays fresh and delicious for days. Plus, the bright, tropical flavor is a welcome change from the usual dessert offerings. It’s a guaranteed way to brighten up any day and leave everyone wanting more! Whether you’re looking for a simple bake or looking to try out a new recipe, this is for you.
Introduction
Baking a cake should be a joy, an act of creation that fills your kitchen with warmth and irresistible aromas. The Pineapple Heaven Cake is exactly that – a recipe that brings a slice of paradise into your home. This recipe is inspired by the desire for a simple, moist cake that delivers a burst of tropical flavor. It’s the kind of cake that begs to be shared, sparking conversations and creating happy memories. The beauty of this cake lies in its simplicity. It requires readily available ingredients and basic baking techniques, yet the end result is nothing short of spectacular. The use of crushed pineapple not only infuses the cake with a delicious, tangy sweetness but also contributes to its incredibly moist texture. The sour cream adds another layer of richness and tang, complementing the pineapple perfectly. And the final touch – a luscious pineapple glaze – ties everything together, creating a truly unforgettable dessert.
This recipe is an opportunity to try out a bake and perhaps take you back to a place where you went on holiday, or simply remind you of a sweet summer treat.
Ingredients:
- 1 ½ cups all-purpose flour
- 1 teaspoon baking powder
- 1 teaspoon salt
- ½ cup unsalted butter (softened)
- 1 cup granulated sugar
- 2 large eggs
- 1 teaspoon vanilla extract
- ½ cup sour cream
- 1 cup crushed pineapple (drained)
- ½ cup powdered sugar
- 2 tablespoons pineapple juice

Preparation:
Step 1: Preheat your oven to 350°F (175°C). This is crucial for even baking. Prepare a loaf pan (approximately 9×5 inches) by greasing it thoroughly with butter or cooking spray. To prevent sticking, lightly dust the greased pan with flour, tapping out any excess. This step ensures the cake releases easily and has a smooth, even crust. This is an important step!
Step 2: In a medium bowl, whisk together the all-purpose flour, baking powder, and salt. Whisking ensures that the ingredients are evenly distributed, preventing lumps and ensuring a light and airy cake. The baking powder is the leavening agent, responsible for the cake’s rise, while the salt enhances the flavors of the other ingredients.
Step 3: In a large bowl, cream together the softened butter and granulated sugar until light and fluffy. This is a critical step for achieving a tender crumb. Use an electric mixer (either a stand mixer or a hand mixer) to beat the butter and sugar on medium speed for about 3-5 minutes. The mixture should become noticeably lighter in color and increase in volume as air is incorporated. The softened butter allows the sugar crystals to aerate the butter creating this light and fluffy texture and look.
Step 4: Add the eggs one at a time, mixing well after each addition. Be sure to scrape down the sides of the bowl between each addition to ensure that all ingredients are fully incorporated. The eggs provide structure and richness to the cake. Stir in the vanilla extract. Vanilla extract enhances the flavors of all the other ingredients.
Step 5: Gradually add the dry ingredients to the butter mixture, alternating with the sour cream, starting and ending with the dry ingredients. Begin by adding about one-third of the flour mixture to the butter mixture, mixing on low speed until just combined. Then, add half of the sour cream, mixing until just combined. Repeat with another third of the flour mixture, the remaining sour cream, and finish with the last third of the flour mixture. Mixing on low speed prevents overmixing, which can result in a tough cake. Starting and ending with the dry ingredients helps to create a stable emulsion.
Step 6: Fold in the drained crushed pineapple until evenly distributed. Gently fold the pineapple into the batter using a spatula or wooden spoon. Be careful not to overmix, as this can deflate the batter and result in a dense cake. The crushed pineapple adds moisture, flavor, and a delightful texture to the cake. Ensure that the pineapple is well-drained to prevent the cake from becoming soggy.
Step 7: Pour the batter into the prepared loaf pan and smooth the top. Distribute the batter evenly in the loaf pan and use a spatula to smooth the surface. This ensures that the cake bakes evenly.
Step 8: Bake for 50-60 minutes, or until a toothpick inserted in the center comes out clean. Place the loaf pan in the preheated oven and bake for 50-60 minutes, or until a toothpick inserted into the center of the cake comes out clean or with just a few moist crumbs attached. If the top of the cake starts to brown too quickly, tent it loosely with foil.
Step 9: Let the cake cool in the pan for 10 minutes before transferring it to a wire rack to cool completely. Allowing the cake to cool in the pan for a few minutes helps it to set up and prevents it from breaking when you invert it onto a wire rack. Cooling the cake completely before glazing is essential to prevent the glaze from melting and running off.
Step 10: To make the glaze, mix the powdered sugar and pineapple juice in a small bowl until smooth. In a small bowl, whisk together the powdered sugar and pineapple juice until smooth. Add more pineapple juice, a teaspoon at a time, until the glaze reaches your desired consistency.
Step 11: Once the cake has cooled, drizzle the glaze over the top before slicing and serving. Drizzle the glaze evenly over the cooled cake. Allow the glaze to set for a few minutes before slicing and serving.
COOKING Rating:
- Difficulty: Easy
Serving Suggestions:
Serve the Pineapple Heaven Cake as a delightful dessert with a scoop of vanilla ice cream or a dollop of whipped cream. It’s also delicious served with a cup of coffee or tea. For a more festive presentation, garnish the cake with fresh pineapple slices or toasted coconut flakes. It can also be paired with some roasted nuts to add a bit of crunch and a different flavour.
Tips:
- For an extra burst of flavor, try adding a tablespoon of rum or coconut extract to the batter.
- If you don’t have sour cream, you can substitute it with plain yogurt or crème fraîche.
- To prevent the cake from sticking, line the loaf pan with parchment paper before greasing and flouring it.
- Store the cake in an airtight container at room temperature for up to 3 days.
Prep Time:
- 15 Minutes
Cook Time:
- 60 Minutes
Total Time:
- 75 Minutes
Nutritional Information (approximate, per serving):
- Calories: 350-400 (depending on serving size and glaze thickness)
- Protein: 4g
- Sodium: 200mg
Conclusion
The Pineapple Heaven Cake is a simple yet exquisite dessert that brings a taste of the tropics to your table. Its moist texture, delightful pineapple flavor, and easy preparation make it a perfect choice for any occasion. Whether you’re baking for a special celebration or simply craving a sweet treat, this cake is sure to impress. So, gather your ingredients, preheat your oven, and get ready to create a slice of paradise.
Frequently Asked Questions:
Q1: Can I use fresh pineapple instead of canned crushed pineapple?
A: While you can use fresh pineapple, canned crushed pineapple is recommended for this recipe because it’s already softened and releases more moisture into the cake, resulting in a moister texture. If you choose to use fresh pineapple, make sure to finely chop it and drain it well before adding it to the batter.
Q2: Can I make this cake ahead of time?
A: Absolutely! This cake is perfect for making ahead of time. In fact, it often tastes even better the next day as the flavors meld together. Simply bake the cake, let it cool completely, and store it in an airtight container at room temperature for up to 3 days. Glaze the cake just before serving for the best presentation.
Q3: Can I freeze this cake?
A: Yes, you can freeze this cake for longer storage. Wrap the cooled cake tightly in plastic wrap, then wrap it again in foil. Freeze for up to 2 months. Thaw the cake overnight in the refrigerator before glazing and serving.
Q4: What if I don’t have a loaf pan? Can I use a different size pan?
A: While a loaf pan is ideal for this recipe, you can use other pan sizes. A round 8-inch cake pan or a square 8-inch baking pan will also work. Keep in mind that the baking time may need to be adjusted depending on the pan size. Start checking for doneness after about 40 minutes.
Q5: Can I add nuts to this recipe?
A: Yes, you can definitely add nuts to this recipe! Chopped walnuts, pecans, or macadamia nuts would be delicious additions. Simply fold about ½ cup of chopped nuts into the batter along with the crushed pineapple. You can also sprinkle some chopped nuts on top of the glaze for added texture and flavor.

Pineapple Heaven Cake
Ingredients
- 1 ½ cups all-purpose flour
- 1 teaspoon baking powder
- 1 teaspoon salt
- ½ cup unsalted butter softened
- 1 cup granulated sugar
- 2 large eggs
- 1 teaspoon vanilla extract
- ½ cup sour cream
- 1 cup crushed pineapple drained
- ½ cup powdered sugar
- 2 tablespoons pineapple juice
Instructions
- Step 1: Preheat your oven to 350°F (175°C). This is crucial for even baking. Prepare a loaf pan (approximately 9×5 inches) by greasing it thoroughly with butter or cooking spray. To prevent sticking, lightly dust the greased pan with flour, tapping out any excess. This step ensures the cake releases easily and has a smooth, even crust. This is an important step!
- Step 2: In a medium bowl, whisk together the all-purpose flour, baking powder, and salt. Whisking ensures that the ingredients are evenly distributed, preventing lumps and ensuring a light and airy cake. The baking powder is the leavening agent, responsible for the cake’s rise, while the salt enhances the flavors of the other ingredients.
- Step 3: In a large bowl, cream together the softened butter and granulated sugar until light and fluffy. This is a critical step for achieving a tender crumb. Use an electric mixer (either a stand mixer or a hand mixer) to beat the butter and sugar on medium speed for about 3-5 minutes. The mixture should become noticeably lighter in color and increase in volume as air is incorporated. The softened butter allows the sugar crystals to aerate the butter creating this light and fluffy texture and look.
- Step 4: Add the eggs one at a time, mixing well after each addition. Be sure to scrape down the sides of the bowl between each addition to ensure that all ingredients are fully incorporated. The eggs provide structure and richness to the cake. Stir in the vanilla extract. Vanilla extract enhances the flavors of all the other ingredients.
- Step 5: Gradually add the dry ingredients to the butter mixture, alternating with the sour cream, starting and ending with the dry ingredients. Begin by adding about one-third of the flour mixture to the butter mixture, mixing on low speed until just combined. Then, add half of the sour cream, mixing until just combined. Repeat with another third of the flour mixture, the remaining sour cream, and finish with the last third of the flour mixture. Mixing on low speed prevents overmixing, which can result in a tough cake. Starting and ending with the dry ingredients helps to create a stable emulsion.
- Step 6: Fold in the drained crushed pineapple until evenly distributed. Gently fold the pineapple into the batter using a spatula or wooden spoon. Be careful not to overmix, as this can deflate the batter and result in a dense cake. The crushed pineapple adds moisture, flavor, and a delightful texture to the cake. Ensure that the pineapple is well-drained to prevent the cake from becoming soggy.
- Step 7: Pour the batter into the prepared loaf pan and smooth the top. Distribute the batter evenly in the loaf pan and use a spatula to smooth the surface. This ensures that the cake bakes evenly.
- Step 8: Bake for 50-60 minutes, or until a toothpick inserted in the center comes out clean. Place the loaf pan in the preheated oven and bake for 50-60 minutes, or until a toothpick inserted into the center of the cake comes out clean or with just a few moist crumbs attached. If the top of the cake starts to brown too quickly, tent it loosely with foil.
- Step 9: Let the cake cool in the pan for 10 minutes before transferring it to a wire rack to cool completely. Allowing the cake to cool in the pan for a few minutes helps it to set up and prevents it from breaking when you invert it onto a wire rack. Cooling the cake completely before glazing is essential to prevent the glaze from melting and running off.
- Step 10: To make the glaze, mix the powdered sugar and pineapple juice in a small bowl until smooth. In a small bowl, whisk together the powdered sugar and pineapple juice until smooth. Add more pineapple juice, a teaspoon at a time, until the glaze reaches your desired consistency.
- Step 11: Once the cake has cooled, drizzle the glaze over the top before slicing and serving. Drizzle the glaze evenly over the cooled cake. Allow the glaze to set for a few minutes before slicing and serving.