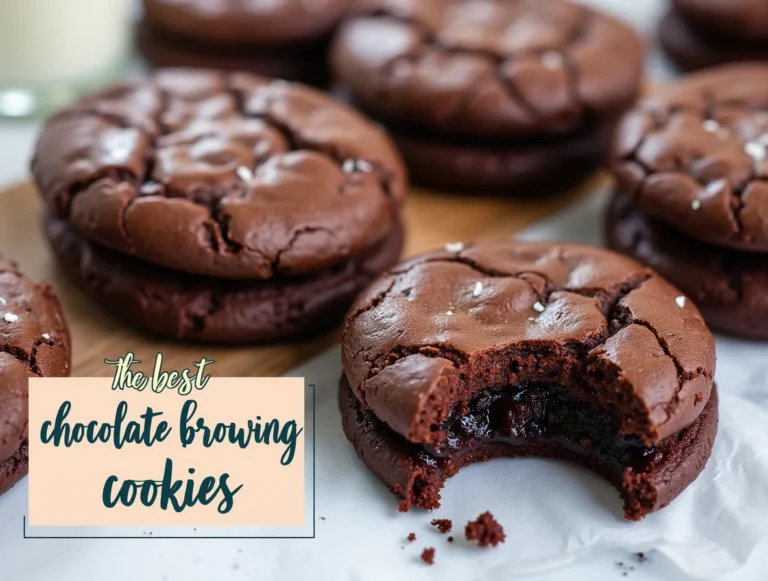
Slutty Brownies

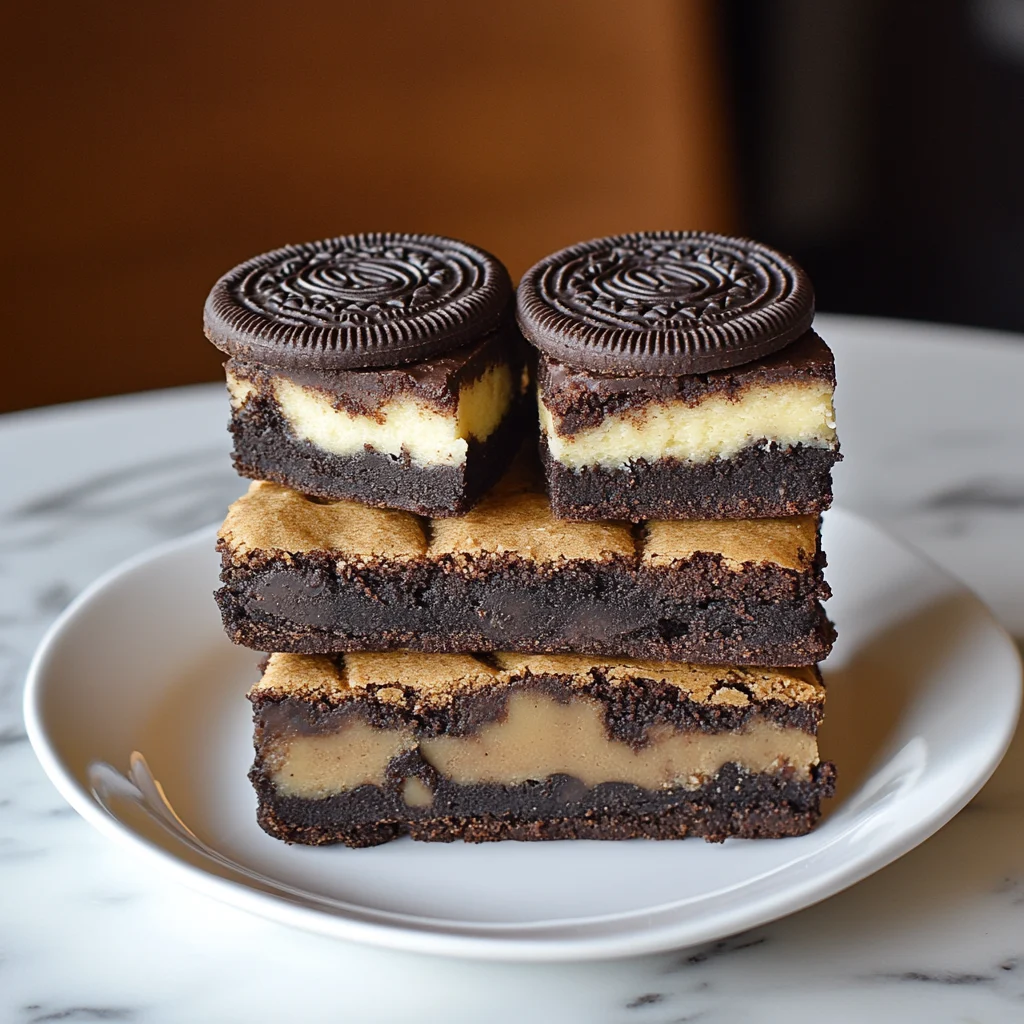
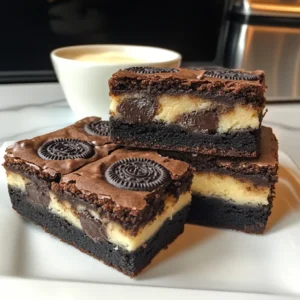
Description of this recipe: These Slutty Brownies are the ultimate decadent dessert, a triple-layered treat that combines the comforting familiarity of a chocolate chip cookie, the playful crunch of Oreo cookies, and the intense fudginess of a classic brownie. This scratch-made recipe is designed to satisfy any sweet craving and guaranteed to impress.
Why you will love this recipe: Get ready to fall in love with these Slutty Brownies! They offer a delightful contrast of textures and flavors, making each bite an experience. The chewy cookie base provides a solid foundation, the Oreo layer adds a touch of whimsy and a creamy sweetness, and the rich, fudgy brownie topping delivers a satisfying chocolate punch. They’re perfect for parties, potlucks, or simply when you need a serious dose of chocolate therapy. Plus, the layers make them visually stunning and utterly irresistible.
Introduction
The name might raise eyebrows, but trust me, these Slutty Brownies are all about pure, unadulterated deliciousness. This recipe has gained immense popularity, and for good reason! It’s a dessert mashup that’s outrageously fun and completely over-the-top. Imagine biting into a warm, gooey brownie and discovering hidden layers of cookie goodness and creamy Oreo filling. This isn’t your average brownie; it’s an experience.
While the combination might seem unconventional, the layers work harmoniously to create a symphony of flavors and textures. The chocolate chip cookie layer provides a buttery, slightly salty counterpoint to the intense sweetness of the Oreos and brownie. The Oreos, nestled between the cookie and brownie, soften slightly during baking, becoming almost like a creamy, dreamy filling. And the fudgy brownie topping? It’s the perfect finishing touch, adding a deep, rich chocolate flavor that ties everything together.
This recipe is surprisingly easy to make, even though it has three separate components. We’ll break down each layer step-by-step, ensuring that even novice bakers can create these show-stopping brownies. The key is to take your time, follow the instructions carefully, and don’t be afraid to get a little messy – after all, that’s part of the fun!
Ingredients:
Chocolate Chip Cookie Layer:
- 3/4 cup unsalted butter (168 grams), softened
- 1/2 cup brown sugar (105 grams)
- 1/2 cup granulated sugar (100 grams)
- 1 large egg
- 1 large egg yolk (discard the white)
- 1 teaspoon vanilla extract
- 1 1/2 cups all-purpose flour (188 grams), aka plain flour
- 1/4 teaspoon salt
- 2/3 cups chocolate chips (120 grams)
Oreo Layer:
- 28 Oreo cookies (classic or your favorite flavor!)
Brownie Layer:
- 1/2 cup unsalted butter (112 grams), cubed
- 6 oz dark chocolate (170 grams), 50-70% cacao, or semi-sweet
- 1 cup granulated sugar (200 grams)
- 2 large eggs
- 1/2 cup all-purpose flour (63 grams)
- 1/4 cup cocoa powder (23 grams)
- 1/2 teaspoon salt
Preparation:
Step 1: Prepare the Oven and Pan
Preheat your oven to 350°F (180°C). Lightly grease a 9×13 inch (23×33 cm) baking pan. Then, line it with parchment paper, leaving an overhang on the sides. Greasing the pan first helps the parchment paper adhere, preventing it from sliding around. This overhang will make it much easier to lift the brownies out of the pan later. Alternatively, you can simply grease the pan thoroughly if you don’t have parchment paper.
Step 2: Make the Chocolate Chip Cookie Layer
In a large bowl, cream together the softened butter, brown sugar, and granulated sugar using an electric mixer. Beat until the mixture is light and fluffy, which usually takes about 2-3 minutes. This step is crucial for creating a tender cookie base. Don’t skimp on the creaming process!
Next, beat in the whole egg, additional egg yolk, and vanilla extract. Using an extra egg yolk adds richness and chewiness to the cookie dough. Be sure to discard the white of the second egg – it’s just the yolk we need for this recipe. Mix until well combined.
With the mixer on low speed, gradually beat in the all-purpose flour and salt. Mix until just combined; be careful not to overmix the dough, as this can result in tough cookies.
Turn off the mixer and stir in the chocolate chips using a rubber spatula or wooden spoon. Ensure the chocolate chips are evenly distributed throughout the dough.
Spoon the chocolate chip cookie dough into the prepared pan and spread it evenly with a spatula. It’s okay if the dough is a little thick; just make sure it covers the entire bottom of the pan.
Step 3: Add the Oreo Layer
Arrange the Oreo cookies on top of the cookie dough, pressing them down slightly to ensure they adhere to the cookie layer. Aim for a neat arrangement. Typically you can get 7 rows of 4 cookies. Add a few half cookies on each row to completely cover the cookie dough layer. Don’t worry if you need to break a few to fill in the gaps. The goal is to create a solid Oreo barrier between the cookie and brownie layers.
Step 4: Prepare the Brownie Batter
Finely chop the dark chocolate (or semi-sweet chocolate). This will help it melt more evenly and prevent any large chunks in the brownie batter.
Place the chopped chocolate and cubed butter into a large heatproof bowl. Microwave on medium power for 45-second intervals, removing the bowl from the microwave between each interval and stirring the mixture. This gradual melting process prevents the chocolate from burning or becoming grainy. Do not microwave on high power!
Once the chocolate and butter are melted and smooth, cool the mixture for about 5 minutes. This is important because adding the eggs while the chocolate is still hot can cause them to cook.
Whisk in the eggs and granulated sugar into the slightly cooled chocolate mixture until well combined and glossy.
In a separate bowl, whisk together the all-purpose flour, cocoa powder, and salt. This ensures that the dry ingredients are evenly distributed and prevents lumps in the brownie batter. If the flour and cocoa powder are lumpy, be sure to sift them before adding them to the wet ingredients.
Gradually whisk the dry ingredients into the wet ingredients until just combined. Be careful not to overmix; a few streaks of flour are okay. Overmixing can lead to tough brownies.
Step 5: Assemble and Bake the Brownies
Spoon the brownie batter over the Oreo layer, dropping spoonfuls across the pan. This prevents the Oreos from shifting around too much.
Gently spread the brownie batter evenly over the Oreos. This process makes it easier to spread the batter over the Oreos without disturbing them.
Bake the brownies in the preheated oven for 37-45 minutes, or until an inserted toothpick comes out with dry or with a few damp crumbs attached. The baking time will vary depending on your oven and how gooey you prefer your brownies. Keep a close eye on them during the last few minutes of baking to prevent them from overbaking.
Step 6: Cool, Slice, and Serve
Cool the brownies completely in the pan (at least 4 hours) before slicing. This is crucial for achieving clean slices and preventing the brownies from crumbling. Cooling them in the fridge can speed up the process.
Before slicing, lift the cooled brownies out of the pan using the overhang of the parchment paper. Place them on a cutting board.
Slice the brownies into 18 squares and serve.
COOKING Rating: Easy to Medium
Serving Suggestions:
- Serve warm with a scoop of vanilla ice cream.
- Drizzle with chocolate sauce or caramel sauce.
- Dust with powdered sugar.
- Enjoy with a glass of cold milk or a cup of coffee.
Tips:
- Use high-quality chocolate for the best flavor.
- Don’t overmix the cookie or brownie batter.
- Allow the brownies to cool completely before slicing for clean cuts.
- Store leftover brownies in an airtight container at room temperature for up to 4 days.
- For even fudgier brownies, underbake them slightly.
- Add a sprinkle of sea salt on top of the brownies after baking for a sweet and salty flavor combination.
- Experiment with different Oreo flavors! Peanut butter, mint, or birthday cake Oreos would all be delicious.
Prep Time: 30 minutes
Cook Time: 45 minutes
Total Time: 1 hour 15 minutes
Nutritional Information:
- Calories: (Estimate) 350-450 per serving (depending on size and ingredients)
- Protein: (Estimate) 4-6 grams per serving
- Sodium: (Estimate) 150-250mg per serving

Conclusion
These Slutty Brownies are more than just a dessert; they’re an experience. With their layers of chewy cookie, creamy Oreos, and fudgy brownie, they’re sure to satisfy even the most intense sweet cravings. So go ahead, indulge in this decadent treat and enjoy every delicious bite! You deserve it!
Q&A about Slutty Brownies:
Q1: Can I use a different type of chocolate in the brownie layer?
A: Absolutely! While I recommend using dark chocolate (50-70% cacao) or semi-sweet chocolate for a rich, intense flavor, you can certainly experiment with other types of chocolate. Milk chocolate will result in a sweeter, milder brownie. You could also try using white chocolate for a unique twist. Just keep in mind that the flavor profile will change depending on the type of chocolate you use.
Q2: Can I make these brownies ahead of time?
A: Yes, you can definitely make these brownies ahead of time! In fact, I often find that they taste even better the next day after the flavors have had a chance to meld together. Simply bake the brownies according to the instructions, let them cool completely, and then store them in an airtight container at room temperature for up to 3 days. Or, for longer storage, you can wrap them tightly in plastic wrap and then foil and freeze them for up to 2 months. Just thaw them completely before serving.
Q3: Can I substitute the all-purpose flour with gluten-free flour?
A: Yes, you can substitute the all-purpose flour with a gluten-free all-purpose blend. When using gluten-free flour, be sure to use a blend that contains xanthan gum, as this helps to bind the ingredients together and provides structure to the brownies. You may also need to add a little extra liquid (1-2 tablespoons of milk or water) to the dough and batter to compensate for the dryness of the gluten-free flour. Keep in mind that the texture of the brownies may be slightly different when using gluten-free flour, but they will still be delicious.
Q4: My brownie batter is very thick. Is that normal?
A: Yes, the brownie batter can be quite thick, especially after you add the dry ingredients. This is because of the high ratio of chocolate and butter to flour. Don’t worry if it seems a little stiff; it will spread out during baking. Just make sure you spread it evenly over the Oreo layer before putting the brownies in the oven. If you find it too difficult to spread, you can try adding a tablespoon or two of milk or cream to the batter to loosen it up a bit.
Q5: Can I add nuts to the brownie layer?
A: Absolutely! Adding nuts to the brownie layer is a great way to add texture and flavor. You can add chopped walnuts, pecans, almonds, or any other type of nut you like. Simply fold about 1/2 to 3/4 cup of chopped nuts into the brownie batter after you’ve mixed in the dry ingredients. Just be sure to chop the nuts into small pieces so they distribute evenly throughout the batter. You can also toast the nuts before adding them to enhance their flavor.
Slutty Brownies
Ingredients
- Chocolate Chip Cookie Layer:
- 3/4 cup unsalted butter 168 grams, softened
- 1/2 cup brown sugar 105 grams
- 1/2 cup granulated sugar 100 grams
- 1 large egg
- 1 large egg yolk discard the white
- 1 teaspoon vanilla extract
- 1 1/2 cups all-purpose flour 188 grams, aka plain flour
- 1/4 teaspoon salt
- 2/3 cups chocolate chips 120 grams
- Oreo Layer:
- 28 Oreo cookies classic or your favorite flavor!
- Brownie Layer:
- 1/2 cup unsalted butter 112 grams, cubed
- 6 oz dark chocolate 170 grams, 50-70% cacao, or semi-sweet
- 1 cup granulated sugar 200 grams
- 2 large eggs
- 1/2 cup all-purpose flour 63 grams
- 1/4 cup cocoa powder 23 grams
- 1/2 teaspoon salt
Instructions
- Step 1: Prepare the Oven and Pan
- Preheat your oven to 350°F (180°C). Lightly grease a 9×13 inch (23×33 cm) baking pan. Then, line it with parchment paper, leaving an overhang on the sides. Greasing the pan first helps the parchment paper adhere, preventing it from sliding around. This overhang will make it much easier to lift the brownies out of the pan later. Alternatively, you can simply grease the pan thoroughly if you don’t have parchment paper.
- Step 2: Make the Chocolate Chip Cookie Layer
- In a large bowl, cream together the softened butter, brown sugar, and granulated sugar using an electric mixer. Beat until the mixture is light and fluffy, which usually takes about 2-3 minutes. This step is crucial for creating a tender cookie base. Don’t skimp on the creaming process!
- Next, beat in the whole egg, additional egg yolk, and vanilla extract. Using an extra egg yolk adds richness and chewiness to the cookie dough. Be sure to discard the white of the second egg – it’s just the yolk we need for this recipe. Mix until well combined.
- With the mixer on low speed, gradually beat in the all-purpose flour and salt. Mix until just combined; be careful not to overmix the dough, as this can result in tough cookies.
- Turn off the mixer and stir in the chocolate chips using a rubber spatula or wooden spoon. Ensure the chocolate chips are evenly distributed throughout the dough.
- Spoon the chocolate chip cookie dough into the prepared pan and spread it evenly with a spatula. It’s okay if the dough is a little thick; just make sure it covers the entire bottom of the pan.
- Step 3: Add the Oreo Layer
- Arrange the Oreo cookies on top of the cookie dough, pressing them down slightly to ensure they adhere to the cookie layer. Aim for a neat arrangement. Typically you can get 7 rows of 4 cookies. Add a few half cookies on each row to completely cover the cookie dough layer. Don’t worry if you need to break a few to fill in the gaps. The goal is to create a solid Oreo barrier between the cookie and brownie layers.
- Step 4: Prepare the Brownie Batter
- Finely chop the dark chocolate (or semi-sweet chocolate). This will help it melt more evenly and prevent any large chunks in the brownie batter.
- Place the chopped chocolate and cubed butter into a large heatproof bowl. Microwave on medium power for 45-second intervals, removing the bowl from the microwave between each interval and stirring the mixture. This gradual melting process prevents the chocolate from burning or becoming grainy. Do not microwave on high power!
- Once the chocolate and butter are melted and smooth, cool the mixture for about 5 minutes. This is important because adding the eggs while the chocolate is still hot can cause them to cook.
- Whisk in the eggs and granulated sugar into the slightly cooled chocolate mixture until well combined and glossy.
- In a separate bowl, whisk together the all-purpose flour, cocoa powder, and salt. This ensures that the dry ingredients are evenly distributed and prevents lumps in the brownie batter. If the flour and cocoa powder are lumpy, be sure to sift them before adding them to the wet ingredients.
- Gradually whisk the dry ingredients into the wet ingredients until just combined. Be careful not to overmix; a few streaks of flour are okay. Overmixing can lead to tough brownies.
- Step 5: Assemble and Bake the Brownies
- Spoon the brownie batter over the Oreo layer, dropping spoonfuls across the pan. This prevents the Oreos from shifting around too much.
- Gently spread the brownie batter evenly over the Oreos. This process makes it easier to spread the batter over the Oreos without disturbing them.
- Bake the brownies in the preheated oven for 37-45 minutes, or until an inserted toothpick comes out with dry or with a few damp crumbs attached. The baking time will vary depending on your oven and how gooey you prefer your brownies. Keep a close eye on them during the last few minutes of baking to prevent them from overbaking.
- Step 6: Cool, Slice, and Serve
- Cool the brownies completely in the pan (at least 4 hours) before slicing. This is crucial for achieving clean slices and preventing the brownies from crumbling. Cooling them in the fridge can speed up the process.
- Before slicing, lift the cooled brownies out of the pan using the overhang of the parchment paper. Place them on a cutting board.
- Slice the brownies into 18 squares and serve.