S’mores Marshmallow Cookies
Description of this recipe
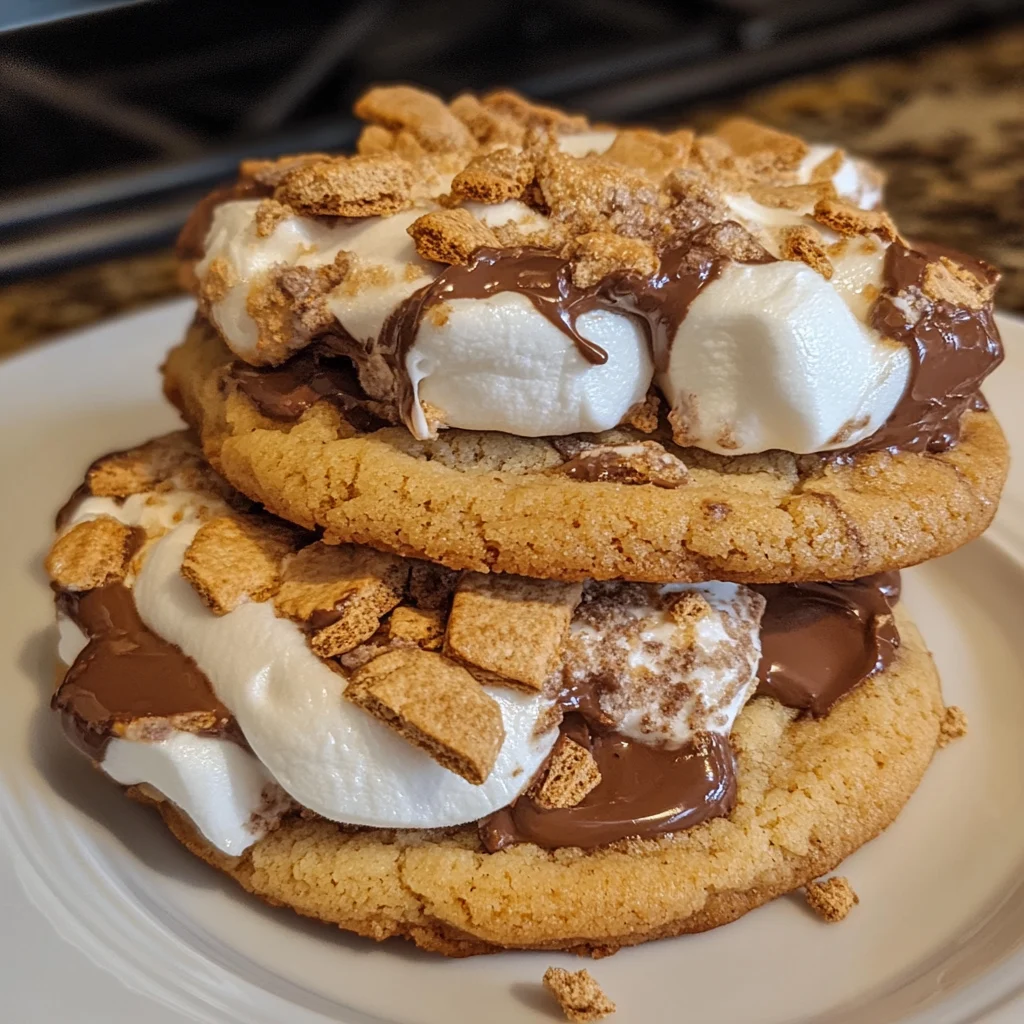
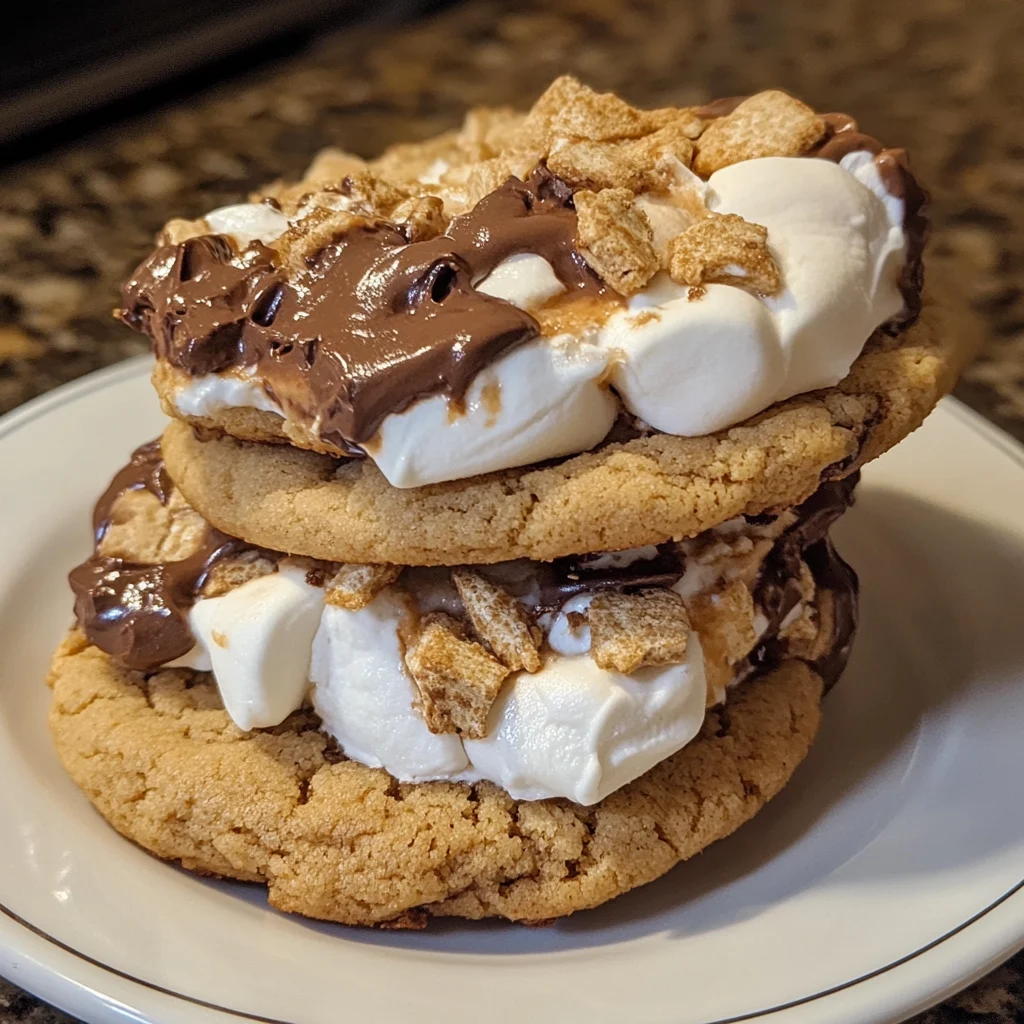
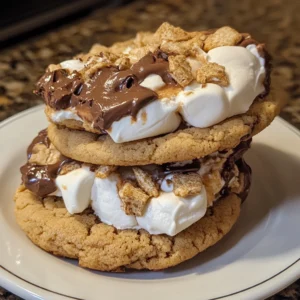
These S’mores Marshmallow Cookies capture all the nostalgic flavors of a classic campfire treat – graham crackers, chocolate, and gooey marshmallows – in a convenient and portable cookie form. These cookies are soft, chewy, and bursting with the familiar s’mores taste that everyone loves. Imagine the perfect balance of a buttery graham cracker base, rich chocolate chunks, and perfectly toasted marshmallows, all in one delicious bite. It’s a guaranteed crowd-pleaser, perfect for bake sales, potlucks, or a simple weeknight treat.
Why you will love this recipe
You’ll adore these S’mores Marshmallow Cookies for so many reasons! First and foremost, they’re incredibly easy to make, using simple ingredients you probably already have in your pantry. The recipe is straightforward and forgiving, making it perfect for both beginner and experienced bakers. Beyond the ease of preparation, the taste is simply irresistible. The combination of the graham cracker-infused dough, the melty chocolate, and the perfectly toasted marshmallows creates a symphony of flavors and textures that will transport you back to cozy campfires and happy memories. Furthermore, these cookies are incredibly versatile. You can customize the chocolate, the size of the marshmallows, and even add a sprinkle of sea salt for an extra layer of flavor. They’re the perfect treat to share with friends and family, and they’re guaranteed to disappear quickly! Finally, the unique texture – the slight crispness of the edges, the soft, chewy center, and the gooey marshmallow topping – sets them apart from your average cookie. These are truly something special!
Introduction
S’mores – the quintessential campfire treat – hold a special place in our hearts. That perfect combination of graham crackers, chocolate, and toasted marshmallows evokes memories of crackling fires, starry nights, and shared laughter. But sometimes, you crave that s’mores goodness without the hassle of building a fire. That’s where these S’mores Marshmallow Cookies come in! This recipe takes all the best elements of the classic s’more and transforms them into a delightful, easy-to-make cookie. Imagine biting into a soft, chewy cookie packed with graham cracker flavor, studded with chunks of rich chocolate, and topped with perfectly toasted, gooey marshmallows. It’s a s’mores experience in every bite, perfect for any occasion. Whether you’re looking for a fun baking project with the kids, a unique dessert to bring to a party, or simply a sweet treat to satisfy your s’mores craving, these cookies are the answer. The graham cracker crumbs incorporated directly into the dough add a distinct flavor and texture that perfectly complements the chocolate and marshmallows. This recipe is not only delicious but also incredibly versatile; you can easily adapt it to your preferences by using different types of chocolate, varying the amount of marshmallows, or adding a sprinkle of sea salt for a sweet and salty twist. Get ready to create some delicious memories with these irresistible S’mores Marshmallow Cookies!
Ingredients:
- 5 ounces (142g) graham crackers (typically 1 full sleeve)
- 1 3/4 cups (245g) all-purpose flour
- 1 teaspoon salt
- 1 teaspoon baking soda
- 3/4 cup (170g) unsalted butter, very soft
- 3/4 cup (161g) packed brown sugar
- 3/4 cup (150g) granulated sugar
- 2 large eggs
- 1 teaspoon vanilla extract
- 2 cups (12 ounces) roughly chopped chocolate or chocolate chips (milk, dark, or semi-sweet)
- About 2 cups mini marshmallows
Preparation:
Step 1: Make the graham cracker crumbs:
- Place the graham crackers in the bowl of a food processor. Process in pulses until the crackers are completely broken down into fine crumbs. Aim for a consistent texture, similar to coarse sand.
- Alternatively: If you don’t have a food processor, place the graham crackers in a zip-top plastic bag. Seal the bag tightly, removing as much air as possible. Use a rolling pin to crush the crackers into fine crumbs. This method might require a bit more elbow grease, but it works just as well! Ensure there aren’t any large pieces of graham cracker remaining.
Step 2: Whisk the dry ingredients:
- In a medium-sized mixing bowl, combine the graham cracker crumbs, all-purpose flour, salt, and baking soda.
- Use a whisk to thoroughly combine all the dry ingredients. This ensures that the baking soda and salt are evenly distributed throughout the flour mixture, which is crucial for proper leavening and flavor balance. Whisking also helps to aerate the flour, resulting in a lighter, more tender cookie.
Step 3: Beat the butter and sugars:
- In a large mixing bowl (or the bowl of a stand mixer fitted with the beater attachment), cream together the softened butter, granulated sugar, and packed brown sugar.
- Beat on medium speed until the mixture is light, fluffy, and well combined, about 3 to 5 minutes. This process is essential for creating a light and airy cookie base. The creaming action incorporates air into the butter, which contributes to the cookie’s texture. Make sure the butter is truly softened, but not melted. If it’s too cold, it won’t cream properly; if it’s melted, the cookies will spread too much.
- Pick out any large clumps or pebbles of hard brown sugar that you see. These can prevent the sugar from dissolving properly and affect the texture of the cookies. Scrape down the sides of the bowl and the beater occasionally to ensure that everything is evenly incorporated.
Step 4: Mix in the eggs and vanilla:
- Add the two large eggs, one at a time, to the butter-sugar mixture, beating well after each addition.
- Continue to beat at medium speed until the mixture is smooth and creamy, with no visible streaks of egg yolk. This step helps to emulsify the mixture and create a stable base for the cookies. Scrape down the sides of the bowl and the beaters after each egg addition to ensure even incorporation.
- Stir in the vanilla extract. The vanilla enhances the overall flavor of the cookies and complements the chocolate and marshmallow flavors.
Step 5: Mix in the dry ingredients:
- Gradually add the graham cracker and flour mixture to the wet ingredients, beating on low speed until just combined.
- Be careful not to overmix the dough. Overmixing can develop the gluten in the flour, resulting in tough cookies. Mix until the dry ingredients are just incorporated, with no visible streaks of flour remaining.
Step 6: Mix in the chocolate:
- Add the chopped chocolate or chocolate chips to the dough and mix on low speed until evenly distributed.
- Use a variety of chocolate types, such as milk chocolate, dark chocolate, or semi-sweet chocolate, to add depth and complexity to the flavor. You can also use chocolate chunks for a more rustic look and a richer chocolate experience.
Step 7: Chill the dough:
- Cover the bowl tightly with plastic wrap or transfer the dough to an airtight container.
- Refrigerate the dough for at least 30 minutes, or up to 3 days. Chilling the dough allows the gluten to relax, which helps to prevent the cookies from spreading too much during baking. It also allows the flavors to meld together, resulting in a more flavorful cookie. For best results, chill for at least 2 hours.
- Alternatively: You can freeze the dough in individual scoops for up to 3 months. This is a great way to have cookie dough on hand for whenever you’re craving a sweet treat. To bake from frozen, simply thaw the dough in the refrigerator for a few hours before baking.
Step 8: Preheat the oven and prepare baking sheets:
- Preheat your oven to 375°F (190°C).
- Place a rack in the middle of the oven. Line two baking sheets with silicone baking mats or parchment paper. This prevents the cookies from sticking to the baking sheets and makes for easy cleanup.
Step 9: Scoop the dough:
- Use a medium cookie scoop (or a well-mounded tablespoon measure) to scoop the dough onto the prepared baking sheets, spacing the cookies about 2 inches apart.
- This allows the cookies to spread evenly without touching each other.
Step 10: Bake the cookies:
- Bake the cookies for 8 to 10 minutes, or until the edges are lightly golden brown and the centers are still slightly soft.
- Remove the baking sheets from the oven.
Step 11: Add the marshmallows:
- Gently press 3 to 4 mini marshmallows into the tops of each cookie.
- Return the cookies to the oven and bake for another 2 to 3 minutes, or until the marshmallows are puffed and lightly golden brown. Keep a close eye on the cookies during this step, as the marshmallows can burn easily.
Step 12: Cool the cookies:
- Remove the baking sheets from the oven and let the cookies cool on the baking sheets for a few minutes before transferring them to a wire rack to cool completely.
- This allows the cookies to firm up slightly and prevents them from breaking when you transfer them.
Step 13: Enjoy!
- Serve the cookies warm or at room temperature.
- Store cooled cookies in an airtight container at room temperature for up to 3 days. The marshmallows may become slightly sticky after a day or two.
COOKING Rating:
- Difficulty: Easy
- Time Commitment: Moderate
- Flavor Profile: Sweet, chocolaty, graham cracker, marshmallow
Serving Suggestions:
- Enjoy these cookies as a standalone treat with a glass of milk or a cup of coffee.
- Serve them warm with a scoop of vanilla ice cream for a decadent dessert.
- Pack them in lunchboxes for a special treat.
- Bring them to potlucks, bake sales, or holiday gatherings.
- Create a s’mores-themed dessert platter with these cookies, graham crackers, and chocolate squares.
Tips:
- For a more intense graham cracker flavor, use graham cracker flour in place of some of the all-purpose flour.
- Use high-quality chocolate for the best flavor.
- Don’t overbake the cookies, as they will become dry and crumbly.
- If the marshmallows are browning too quickly, cover the cookies with foil during the last few minutes of baking.
- To prevent the marshmallows from sticking to the baking sheets, line them with parchment paper or silicone baking mats.
- For a fun twist, add a sprinkle of sea salt to the tops of the cookies before baking.
- If you want a gooey marshmallow center, add the marshmallows in the last minute of baking.
- Experiment with different flavors of marshmallows, such as vanilla, chocolate, or strawberry.
Prep Time:
- 10 minutes
Cook Time:
- 12 minutes
Chill Time:
- 30 minutes
Total Time:
- 52 minutes
Nutritional Information (per cookie):
- Note: Nutritional information is an estimate and can vary based on specific ingredients and portion sizes.
- Calories: Approximately 120-150
- Protein: Approximately 1-2 grams
- Sodium: Approximately 50-70mg
Conclusion
These S’mores Marshmallow Cookies are a delightful twist on a classic campfire treat, bringing the beloved flavors of graham crackers, chocolate, and gooey marshmallows into a convenient and irresistible cookie form. They are easy to make, versatile, and guaranteed to be a crowd-pleaser. Whether you’re looking for a fun baking project with the kids, a unique dessert to share with friends and family, or simply a sweet treat to satisfy your s’mores craving, these cookies are the perfect choice. So, gather your ingredients, preheat your oven, and get ready to create some delicious memories with these irresistible S’mores Marshmallow Cookies! They are a guaranteed conversation starter and are sure to be the hit of any gathering! Don’t be surprised when everyone asks for the recipe. Enjoy!
Questions and Answers:
Q1: Can I use different types of chocolate in this recipe?
A: Absolutely! This recipe is incredibly flexible when it comes to chocolate. You can use milk chocolate for a sweeter, more traditional s’mores flavor, dark chocolate for a richer, more intense chocolate experience, or semi-sweet chocolate for a balanced flavor. You can even mix different types of chocolate together for a more complex and interesting flavor profile. Chocolate chips are a convenient option, but roughly chopped chocolate bars will give you larger, more melty pieces of chocolate in each cookie. White chocolate can also be used for a delightful twist. Don’t be afraid to experiment and find your favorite chocolate combination!
Q2: What can I do if my marshmallows are burning too quickly?
A: If you notice the marshmallows are browning too quickly during the final baking stage, you can easily protect them. Simply loosely tent a piece of aluminum foil over the baking sheet. This will shield the marshmallows from direct heat while still allowing the cookies to bake through. Another option is to lower the oven temperature slightly and extend the baking time. Keep a close eye on the cookies and remove them from the oven as soon as the marshmallows are puffed and lightly golden brown.
Q3: How can I prevent the cookies from spreading too thin?
A: Preventing cookies from spreading too thin involves a few key factors. First, make sure your butter is softened but not melted. Melted butter will cause the cookies to spread excessively. Chilling the dough for at least 30 minutes is crucial, as it allows the butter to solidify and the gluten to relax. If you live in a warm climate, you may need to chill the dough for longer. Avoid overmixing the dough, as this can develop the gluten and lead to spreading. Finally, make sure your oven is at the correct temperature, as an oven that’s too hot can also cause the cookies to spread.
Q4: Can I make these cookies ahead of time?
A: Yes, you can definitely make these cookies ahead of time! The unbaked cookie dough can be stored in the refrigerator for up to 3 days or frozen for up to 3 months. If refrigerating, let the dough sit at room temperature for about 15-20 minutes before scooping and baking. If freezing, thaw the dough in the refrigerator overnight before baking. Baked cookies can be stored in an airtight container at room temperature for up to 3 days, although the marshmallows may become slightly sticky over time.
Q5: Is there a way to make these cookies gluten-free?
A: Yes, you can easily adapt this recipe to be gluten-free! Simply substitute the all-purpose flour with a gluten-free all-purpose flour blend. Be sure to use a blend that contains xanthan gum or add it separately, as it helps to bind the ingredients together and prevent the cookies from becoming crumbly. You will also need to ensure that the graham crackers you use are gluten-free. Many brands now offer gluten-free graham crackers, which are a perfect substitute. With these simple substitutions, you can enjoy delicious gluten-free S’mores Marshmallow Cookies!
S’mores Marshmallow Cookies
Ingredients
- 5 ounces 142g graham crackers (typically 1 full sleeve)
- 1 3/4 cups 245g all-purpose flour
- 1 teaspoon salt
- 1 teaspoon baking soda
- 3/4 cup 170g unsalted butter, very soft
- 3/4 cup 161g packed brown sugar
- 3/4 cup 150g granulated sugar
- 2 large eggs
- 1 teaspoon vanilla extract
- 2 cups 12 ounces roughly chopped chocolate or chocolate chips (milk, dark, or semi-sweet)
- About 2 cups mini marshmallows
Instructions
- Step 1: Make the graham cracker crumbs:
- Place the graham crackers in the bowl of a food processor. Process in pulses until the crackers are completely broken down into fine crumbs. Aim for a consistent texture, similar to coarse sand.
- Alternatively: If you don’t have a food processor, place the graham crackers in a zip-top plastic bag. Seal the bag tightly, removing as much air as possible. Use a rolling pin to crush the crackers into fine crumbs. This method might require a bit more elbow grease, but it works just as well! Ensure there aren’t any large pieces of graham cracker remaining.
- Step 2: Whisk the dry ingredients:
- In a medium-sized mixing bowl, combine the graham cracker crumbs, all-purpose flour, salt, and baking soda.
- Use a whisk to thoroughly combine all the dry ingredients. This ensures that the baking soda and salt are evenly distributed throughout the flour mixture, which is crucial for proper leavening and flavor balance. Whisking also helps to aerate the flour, resulting in a lighter, more tender cookie.
- Step 3: Beat the butter and sugars:
- In a large mixing bowl (or the bowl of a stand mixer fitted with the beater attachment), cream together the softened butter, granulated sugar, and packed brown sugar.
- Beat on medium speed until the mixture is light, fluffy, and well combined, about 3 to 5 minutes. This process is essential for creating a light and airy cookie base. The creaming action incorporates air into the butter, which contributes to the cookie’s texture. Make sure the butter is truly softened, but not melted. If it’s too cold, it won’t cream properly; if it’s melted, the cookies will spread too much.
- Pick out any large clumps or pebbles of hard brown sugar that you see. These can prevent the sugar from dissolving properly and affect the texture of the cookies. Scrape down the sides of the bowl and the beater occasionally to ensure that everything is evenly incorporated.
- Step 4: Mix in the eggs and vanilla:
- Add the two large eggs, one at a time, to the butter-sugar mixture, beating well after each addition.
- Continue to beat at medium speed until the mixture is smooth and creamy, with no visible streaks of egg yolk. This step helps to emulsify the mixture and create a stable base for the cookies. Scrape down the sides of the bowl and the beaters after each egg addition to ensure even incorporation.
- Stir in the vanilla extract. The vanilla enhances the overall flavor of the cookies and complements the chocolate and marshmallow flavors.
- Step 5: Mix in the dry ingredients:
- Gradually add the graham cracker and flour mixture to the wet ingredients, beating on low speed until just combined.
- Be careful not to overmix the dough. Overmixing can develop the gluten in the flour, resulting in tough cookies. Mix until the dry ingredients are just incorporated, with no visible streaks of flour remaining.
- Step 6: Mix in the chocolate:
- Add the chopped chocolate or chocolate chips to the dough and mix on low speed until evenly distributed.
- Use a variety of chocolate types, such as milk chocolate, dark chocolate, or semi-sweet chocolate, to add depth and complexity to the flavor. You can also use chocolate chunks for a more rustic look and a richer chocolate experience.
- Step 7: Chill the dough:
- Cover the bowl tightly with plastic wrap or transfer the dough to an airtight container.
- Refrigerate the dough for at least 30 minutes, or up to 3 days. Chilling the dough allows the gluten to relax, which helps to prevent the cookies from spreading too much during baking. It also allows the flavors to meld together, resulting in a more flavorful cookie. For best results, chill for at least 2 hours.
- Alternatively: You can freeze the dough in individual scoops for up to 3 months. This is a great way to have cookie dough on hand for whenever you’re craving a sweet treat. To bake from frozen, simply thaw the dough in the refrigerator for a few hours before baking.
- Step 8: Preheat the oven and prepare baking sheets:
- Preheat your oven to 375°F (190°C).
- Place a rack in the middle of the oven. Line two baking sheets with silicone baking mats or parchment paper. This prevents the cookies from sticking to the baking sheets and makes for easy cleanup.
- Step 9: Scoop the dough:
- Use a medium cookie scoop (or a well-mounded tablespoon measure) to scoop the dough onto the prepared baking sheets, spacing the cookies about 2 inches apart.
- This allows the cookies to spread evenly without touching each other.
- Step 10: Bake the cookies:
- Bake the cookies for 8 to 10 minutes, or until the edges are lightly golden brown and the centers are still slightly soft.
- Remove the baking sheets from the oven.
- Step 11: Add the marshmallows:
- Gently press 3 to 4 mini marshmallows into the tops of each cookie.
- Return the cookies to the oven and bake for another 2 to 3 minutes, or until the marshmallows are puffed and lightly golden brown. Keep a close eye on the cookies during this step, as the marshmallows can burn easily.
- Step 12: Cool the cookies:
- Remove the baking sheets from the oven and let the cookies cool on the baking sheets for a few minutes before transferring them to a wire rack to cool completely.
- This allows the cookies to firm up slightly and prevents them from breaking when you transfer them.
- Step 13: Enjoy!
- Serve the cookies warm or at room temperature.
- Store cooled cookies in an airtight container at room temperature for up to 3 days. The marshmallows may become slightly sticky after a day or two.

