Step 1: Make the Filling
In a large skillet, heat the olive oil over medium heat. Add the minced garlic and cook for about 30 seconds until fragrant, being careful not to burn it.
Step 2: Add the chopped mushrooms to the skillet. Let them brown on one side for approximately 5 minutes without stirring. This step enhances their umami flavor and gives them a better texture. Then, stir them until all the liquid has cooked out and the mushrooms are thoroughly cooked, which usually takes another 5-7 minutes. Properly cooked mushrooms add depth to the filling's flavor.
Step 3: Add the ground chicken to the skillet, along with a pinch of salt and a pinch of pepper. Break the chicken apart with a spoon or spatula. Cook until the chicken is mostly cooked through, about 4 to 5 minutes, ensuring no pink remains.
Step 4: Stir in the shredded cabbage, carrots, green onions, soy sauce, and rice vinegar. Continue cooking until the cabbage and carrots are wilted, which should take around 3-5 minutes. The vegetables should still retain some texture, adding a nice contrast to the ground chicken.
Step 5: Sprinkle in 1 teaspoon of cornstarch and continue cooking until all the liquid is evaporated and the mixture thickens. This step is crucial to prevent soggy spring rolls. The filling should be relatively dry and cohesive. Ensure the filling isn’t too wet, as excess moisture can make the wrappers soggy.
Step 6: Cool the Filling
Allow the filling to cool completely. You can speed up the cooling process by transferring it to the refrigerator or spreading it out on a baking sheet in the fridge. Cooling the filling is essential to prevent the wrappers from becoming soggy and tearing during assembly.
Step 7: Assemble Spring Rolls
When ready to assemble, peel off an egg roll or spring roll wrapper. If using typical spring roll or egg roll wrappers, cover the remaining wrappers with a damp paper towel or dish towel to prevent drying. If using rice paper spring roll wrappers, soak one wrapper at a time in a shallow water bowl for about 10 seconds to soften it before filling. Avoid soaking multiple wrappers at once, as they can become sticky and difficult to handle.
Step 8: Place the wrapper on a clean cutting board or work surface.
Rice Paper: Dip the circular wrapper in water for 10 seconds, then place it on a clean cutting board. Add a heaping spoonful of the filling to the bottom corner of the wrapper. Fold in the sides, then roll until the wrapper is completely sealed.
Rice Paper (Alternate Method): Place the wrapper in a diamond position. Add a heaping spoonful of the filling to the bottom corner of the wrapper. Roll halfway, then fold in the sides. Continue rolling until the wrapper is completely sealed. Use the cornstarch water slurry to seal the edges.
Step 9: Use a cornstarch and water slurry to seal the edges of the spring rolls. This helps prevent them from unraveling during cooking.
Step 10: Repeat the process until all the spring rolls are assembled.
Step 11: Air Fry Them
Preheat the air fryer to 380 degrees Fahrenheit. This ensures even cooking and optimal crispness.
Step 12: Spray or brush the air fryer basket with oil spray. This prevents the spring rolls from sticking and promotes even browning.
Step 13: Add the spring rolls to the air fryer, making sure they are not overcrowded. If necessary, work in batches to ensure even cooking. Spray the spring rolls generously with avocado or olive oil spray. The oil helps to achieve a golden-brown, crispy exterior.
Step 14: Air fry the spring rolls for 8-10 minutes, flipping them halfway through, until they are golden brown on all sides. Adjust the cooking time based on your air fryer model. Check the spring rolls frequently to prevent burning.
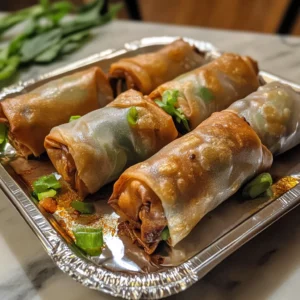
Step 15: Serve Immediately
Once cooked, remove the spring rolls from the air fryer and serve them immediately. Serve with your favorite dipping sauce.