Step 1: PREPARE THE PAN: Line a 9x13-inch baking dish with parchment paper, leaving an overhang on the sides for easy removal. Lightly grease the parchment paper with butter or nonstick spray. This crucial step prevents the treats from sticking and makes it effortless to lift them out of the pan later. If you don't have parchment paper, you can heavily grease the pan.
Step 2: MELT THE MARSHMALLOW MIXTURE: In a large, heavy-bottomed pot, melt the butter over low heat. The low heat is important to prevent the butter from browning or burning, which can affect the flavor of the treats. Once the butter is melted, add the mini marshmallows and stir continuously with a spatula until they are completely melted and the mixture is smooth. Make sure to scrape the bottom and sides of the pot to prevent the marshmallows from sticking and burning. Remove the pot from the heat and stir in the vanilla extract and salt. The vanilla extract enhances the sweetness and adds a touch of warmth, while the salt balances the flavors and prevents the treats from being overly sweet.
Step 3: MIX IN THE CEREAL: Pour the Rice Krispies cereal into the marshmallow mixture. Gently fold the cereal into the mixture, ensuring that every piece is evenly coated with the melted marshmallow. Work quickly but carefully to avoid crushing the cereal. The goal is to achieve a uniform coating while maintaining the crispy texture of the Rice Krispies. The faster you work, the better, as the marshmallow mixture will start to harden as it cools.
Step 4: PRESS INTO THE PAN: Transfer the Rice Krispie mixture to the prepared baking dish. Use a greased spatula or your buttered hands (slightly dampened) to press the mixture down evenly into the pan. Press firmly to create a compact layer, but avoid pressing too hard, which can make the treats dense and tough. A smooth, even surface will also provide a better base for decorating. Let the treats set at room temperature for at least 30 minutes before decorating. This allows the marshmallow mixture to cool and solidify, ensuring that the treats hold their shape.
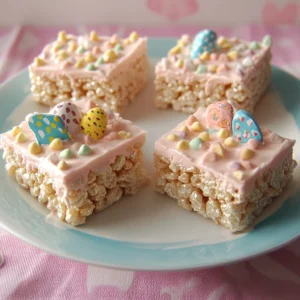
Step 5: DECORATE: Once the bars are set, melt the candy melts according to the package instructions. You can melt them in a microwave-safe bowl in 30-second intervals, stirring in between, or in a double boiler over simmering water. Be careful not to overheat the candy melts, as they can become lumpy or seize. Once the candy melts are smooth and melted, drizzle them over the bars in a crisscross pattern using a spoon, a fork, or a piping bag. Immediately sprinkle on Easter sprinkles and gently press in mini chocolate eggs. The candy melts will act as a glue, holding the sprinkles and eggs in place. Get creative with your decorations! You can create patterns, use different colors of candy melts, and arrange the chocolate eggs in fun and festive ways.
Step 6: CUT AND SERVE: Let the decorations set completely before cutting the treats into squares or rectangles. This will prevent the decorations from smearing or falling off. Use a sharp knife to cut the treats into even pieces. Store the Easter Rice Krispie Treats in an airtight container at room temperature for up to 3 days.