Step 1: Preheat oven to 350°F (180°C).
Preheating the oven is crucial for even baking. This ensures that the crust sets properly and the filling bakes to a creamy consistency.
Step 2: In a large mixing bowl, beat cream cheese until smooth.
Using an electric mixer (handheld or stand mixer), beat the softened cream cheese on medium speed until it is completely smooth and free of lumps. This will create the base for a perfectly textured filling. Avoid over-mixing, as this can incorporate too much air into the cream cheese.
Step 3: Gradually add powdered sugar, beating until combined.
Slowly add the powdered sugar to the cream cheese, one spoonful at a time, beating on low speed until it is fully incorporated. This gradual addition prevents the powdered sugar from flying everywhere and ensures that it is evenly distributed throughout the cream cheese. Scrape down the sides of the bowl as needed to ensure that all of the powdered sugar is mixed in.
Step 4: Stir in vanilla extract.
Add the vanilla extract to the cream cheese mixture and stir until it is evenly distributed. This will infuse the filling with a warm and inviting flavor.
**Step 5: Divide and Color the filling. **
Divide the batter evenly in small separate bowls. Add drops of food coloring to each bowl to achieve desired colors.
Step 6: Pour filling into graham cracker crust.
Pour the plain cream cheese filling into the prepared graham cracker crust. Spread it evenly across the bottom of the crust.
Step 7: Spoon dollops of each color randomly over the plain cheesecake batter in the crust.
This will give you the desired color separation.
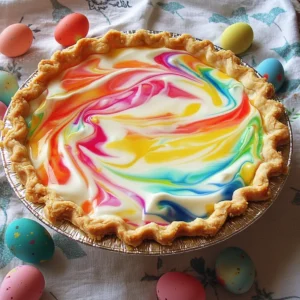
Step 8: Use a toothpick or skewer to gently swirl the colors together, creating a marbled effect.
Insert the toothpick or skewer into the filling and gently swirl it in a circular motion, creating a marbled effect. Be careful not to over-swirl, as this can muddy the colors. The goal is to create a beautiful and artistic swirl design that is both visually appealing and evenly distributed.
Step 9: If desired, create a swirl design on top using pastel-colored M&M’s or Easter-themed candies.
Arrange the candies on top of the filling in a swirl pattern. You can create a simple spiral design or get creative with more intricate patterns. Gently press the candies into the filling to ensure that they adhere properly.
Step 10: Bake for 40-45 minutes or until set.
Place the pie in the preheated oven and bake for 40-45 minutes, or until the filling is set. The filling should be firm to the touch and slightly golden brown around the edges. To prevent the crust from burning, you can cover it with aluminum foil during the last 15 minutes of baking.
Step 11: Chill before serving.
Remove the pie from the oven and let it cool completely on a wire rack. Once it has cooled, cover it with plastic wrap and refrigerate for at least 2 hours before serving. Chilling the pie allows the filling to set completely and enhances the flavors.